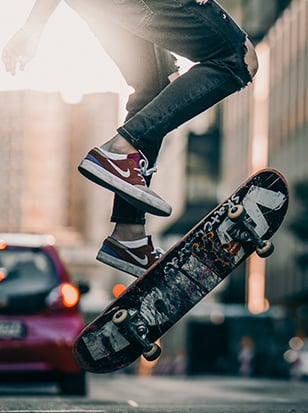
If we constantly aim for sharpness, do we overlook the occasions where blur might be more appropriate?

One side effect of digital photography is that we have become obsessed with sharpness. Get a bunch of keen amateurs together on a shoot and you will see them anxiously zooming into their images to check that nothing is even slightly soft. Viewing images at 100% on-screen is very easy in Adobe Photoshop or Lightroom, and it can cause a lot of needless anxiety. People tend to forget that an image that’s only going to be printed at A4, for example, can still look sharp even if it appears a tad soft when the pixels are blown up on the computer. So sharpness is a relative, rather than an absolute, concept (though you should always strive to keep critical areas sharp, such as the eyes in a portrait, for example).
It’s also easy to forget that, used properly, ‘non sharpness’ can be an effective creative technique. The classic example is a racing car in motion; yes, you can shoot it going past at a very high shutter speed, but this can make the car look as if it’s just standing still, parked on the track. You get a much greater sense of the car’s speed if you blur out the background by panning as it moves.
So, what are some of the most effective blur techniques and how (and when) should you use them? The first thing to emphasise is that in mainstream photography you generally want to keep some aspect of the image sharp. To return to our panning example, the racing car is kept sharp while the background is blurred out. To achieve this, you would need to start at a shutter speed of 1/250sec and lengthen it to get more blur as required. Try to use continuous autofocus (AI Servo) with your camera on its burst mode, and keep tracking the vehicle after you have finished panning with your body. Make sure you practise by the side of the road rather than making rookie errors on the day of the big race.
Another good motion-blur technique involves blurring out people walking past. Again, this helps to convey movement and urban buzz, and it’s a popular image on websites; if the BBC News website is running a story on the Post Office, for example, you can bet it publishes a picture of a blurry pedestrian walking past the Post Office logo. Ideally, you would use a tripod and a variable neutral-density (ND) filter to blur the person while keeping the background sharp at a longer exposure, but it’s also possible to achieve this when shooting handheld if your camera or lens has some form of image stabilisation. If you hold the camera steady and carefully focus on the background, you can often go as slow as 1/15sec or even longer to blur out passers-by, while keeping the rest of the scene acceptably sharp. This gives you the best of both worlds as you don’t need to lug around a tripod and attract people’s attention as they stroll past.
Motion blur can be hugely effective when photographing action, too. If you look at the websites of most sports photographers, they usually feature some creatively blurred images of athletes, even though these artier shots don’t tend to make the sports pages of the papers. It’s a great technique to use when shooting dancers or martial artists too, or any kind of circular movement. Try using a tripod so you can decrease shutter speeds, or make the most of image stabilisation on your camera when shooting handheld. The art is to add just enough blur to convey dynamic movement but not so much that the subject becomes an amorphous smear. Again, try to keep some aspects of the shot sharp if you can, though this can be trickier at sports events where you also want clean, distraction-free backgrounds.
Last but not least is the classic technique for slowing waves, waterfalls and other moving water. Personally, I think this has become something of a cliché in landscape photography, but it can still be effective, particularly in black and white. Here you will definitely need to use a tripod to keep the background sharp at slow shutter speeds. Shooting on cloudier days makes it easier to avoid overexposure at slow shutter speeds too.
There isn’t enough room here to cover every example of why images don’t always need to be perfectly sharp, but hopefully I’ve given you some inspiration to have a go. With image stabilisation increasingly standard, artful blur has become a lot easier to pull off when you leave the tripod at home.
Do you agree with Geoff? Tell us what you think in the Comments section below.
About the Author
Geoff is an experienced photography journalist and recently stepped down as editor of Digital Camera, the UK’s best-selling photography magazine. He now writes for a range of publications. Geoff is a keen travel and portrait photographer, and a Licentiate of the Royal Photographic Society.