As the temperature starts to drop and the ever-shortening days hint at the distant approach of winter, the onset of autumn is, perhaps, the most wonderful time for landscape photography. The incredible explosion of colour on our trees can help transform even a mundane scene into an eye-catching image. Autumn presents a whole world of photographic opportunities, so make the most of it by getting out there and enjoying those crisp, clear mornings, the frost on the ground and fantastic colour everywhere.
Here are ten tips to help you get the best images this autumn.
1. Plan ahead

There's no fixed time that the colour change takes place. It's usually sometime in mid to late October - the weather dictates this - but you have to be quick to capture the ever-changing colours at their very best. Don't put it off because the weather isn’t quite perfect - all it takes is a strong wind for all the leaves to fall to the ground and you’ve missed your chance! Check the weather forecast and, if you can, watch the steady process of autumnal change so that you can plan to be out at the moment when the trees are looking their absolute best.
2. Get the timing right

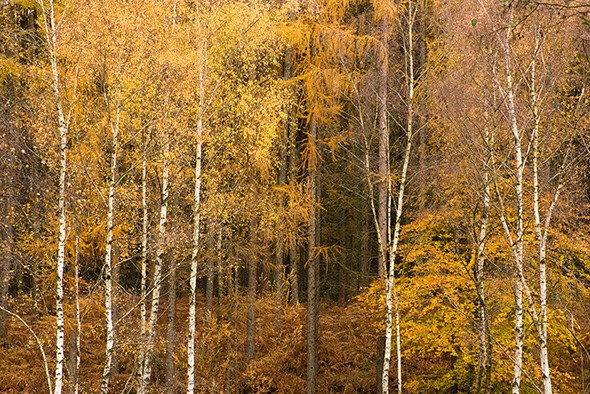
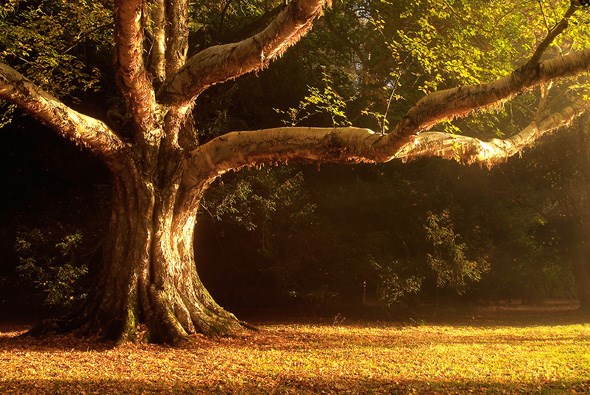
As with most landscape photography, the key to a successful autumn image is to pick your time of day carefully. Early mornings may bring mist which presents a great opportunity for some atmospheric images. Look for the sun's rays penetrating down into woodland, illuminating it with shafts of light. Frost is sometimes present during those chilly autumn mornings too, and can add a wonderful element to your images as either a frost-covered foreground or frost-tinged leaves in detailed macro images. Later in the day you’ll find yourself presented with a much warmer light which will cast a golden glow over the scene.
3. Observe

When you arrive at a location, spend time looking around for interesting trees and viewpoints before even taking your camera out of the bag. Rather than simply taking a picture, seek instead to capture the spirit of your subject, be it a single tree or a beautiful golden avenue. Try to express what it is that enthrals you about the scene. Is it the size, shape or colour of a particular tree? Or is it its age, strength, or its sheer magnificence? If you first try to understand your visual and emotional reaction to the scene you'll be in a much better position to create a picture which tells a story.
4. Use a tripod

Using a tripod is vital. Not only will it steady the camera but it will also slow you down and enable you to think more carefully about your composition.
5. Be creative with composition and lens choice

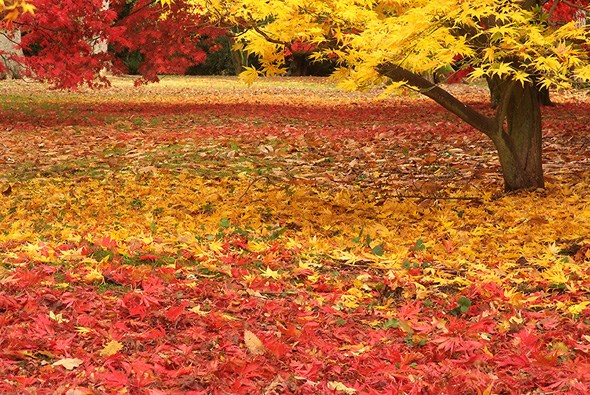
When composing your image, explore different angles of view. Why not try looking up into the tree canopy and filling the frame with leaves? Remember to look down too; a carpet of newly fallen leaves is something we will only ever see once a year. Go in close, look for patterns and shapes and opt for a macro shot to capture the intricate detail of a leaf with early morning dew.
Make use of every single lens in your camera bag. A telephoto lens will have the effect of bringing your subject closer to you and seemingly compressing perspective. This can be useful when photographing an avenue of trees, for example, when you want them to appear closer together. A wideangle lens, meanwhile, will capture a greater field of view and give you the opportunity to include more of the scene. You may even choose to capture some foreground interest such as a fallen branch or tree trunk.
Look for leading lines, such as a path, to draw the viewer's eye into the image. Don’t be afraid to experiment, too. Backlit leaves can look really effective with the light shining through, giving them a sense of transparency. This can create some strong and vibrant colours, but make sure the sun is hidden in some way to avoid problems with burnt out highlights or flare.
The tree is an incredible organism so allow it to express itself and give it a sense of magnificence. Add emphasis to its size, possibly by adding a human element or by including something of the forest floor to add perspective. Think about the muscular nature of the branches and the way they intertwine with one another. You could use branches to lead the eye into the image, or even to frame a view within it. Watch carefully where you crop your image and try not to chop a branch off in an unnatural way.
6. Keep things simple

When presented with a beautiful, colourful scene, the tendency is to try and include everything in the image. Simplicity, however, often works best. When using a wideangle lens, be careful not to go too wide and include unwanted elements in the frame. Be especially wary of including too much within the image so that the viewer loses sight of the main subject. Keep things clean and uncluttered and don’t forget to look around the edges of the viewfinder before you release the shutter.
7. Capture leaves and trees in motion

When the wind is blowing, use it to your advantage. A particularly blowy day is a great time to capture falling leaves, either by using a fast shutter speed to freeze them or a slow shutter speed to capture their movement as they flutter to the ground. With just a slight breeze, try using multiple exposures to create a soft rustling effect. Another interesting technique is to try shooting some abstract shots by deliberately panning the camera up or down the line of the tree trunks as you release the shutter.
8. Experiment with depth of field and focusing

Use depth of field creatively and experiment with different apertures. Photograph with a smaller aperture such as f/13 to obtain significant depth of field before opening up the aperture to see the different result that is obtained when depth of field is minimal. It's vital, particularly with close-up work and detail shots, to ensure your images are pin sharp, so use the depth-of-field preview button on your camera or Live View to help you focus and check as you go. When throwing something out of focus to give prominence to something else, pay attention to how the defocused elements will be a part of the image. You may find, for example, you need to open up the aperture to achieve a more pleasing contrast between this and the focused subject.
9. Understand light, filters and white balance

Don’t assume that you always need good weather to capture the beauty of autumn. Those moments after a rain shower when the air is clean and clear present a perfect opportunity for crisp images. A sunny day may set colours on fire, but it can also have the negative effect of producing harsh contrasts. In this situation you can make use of a polarising filter to cut down reflections and to help intensify the autumn colours. A polariser is also useful for darkening a blue sky above the treetops and adding contrast by accentuating clouds.
A bright, overcast day will often provide the best possible conditions for forest and woodland images. The soft, diffused light allows the colours to shout out more, while the risk of distracting, blown highlights will be lessened. If shooting in the JPEG format on an overcast day, set your white balance to shady to give an overall warmer tone to your image.
10. Colour contrasts

It’s all about colour in autumn, so as well as capturing single colours look out for those that contrast. Use a blue sky to emphasise yellow, orange or red leaves and think about framing your image in such a way that the different tones contrast with one another, such as a fallen red leaf on a green, mossy root. Another thing to look out for is a collection of leaves that feature all the autumnal hues.
When you look more closely at trees and leaves, there are so many opportunities for creative and unusual shots. So don’t delay - reach for your camera and make the most of the explosion of colour this autumn!
Do you fancy joining Sarah on one of her landscape workshops? Click here for more details!
About the Author
Sarah Howard is a professional travel and landscape photographer who runs photographic workshops around the country. For more information visit her website.

