
My style of food photography has developed and changed over the years, mainly due to the different types of content I have been producing. One thing my style of shooting has always been is very candid – for video and for stills, focusing on capturing those moments where the subject is acting completely naturally. In the case of chefs, when they’re cooking and plating.
One of my first food shoots was with Heinz Beck, who is a three-Michelin-starred chef in Rome. He didn’t wait around, so thankfully my quick and out-of-the-way style of shooting was definitely a good fit for his fast-paced and regimented kitchen.
Next, I started working for Street Feast, creating content with street food traders. Having to think quickly to get the best-looking shots of street food stalls and traders is quite a difficult thing to master, but doing so really helped me learn what to look out for in terms of using natural light.
When I began shooting more restaurants and plated dishes, I soon discovered that I wanted to control the light and create more stylised images. I started teaching myself to use an off-camera flash. This opened up a huge creative door for me, and I started to pull out the flash more and more during shoots.
How to stage food for photography?
There are lots of tips and tricks for staging food for photography. Prepping beforehand can make a lot of difference. Knowing which dishes you’re shooting and what goes into them is very important. Ask the chef how they prepare it, how they serve it, what garnish they use to finish it off. I find these details really help when thinking about what kind of angle you want to shoot from.
If it’s side-on, you’ll need to stage the background too. This is where you start to think about props. Do you want a clean and crisp feel with a light background? Or a more rustic feel, perhaps with a dark wood? Begin to visualise the image in your head – perhaps create a mood board beforehand.
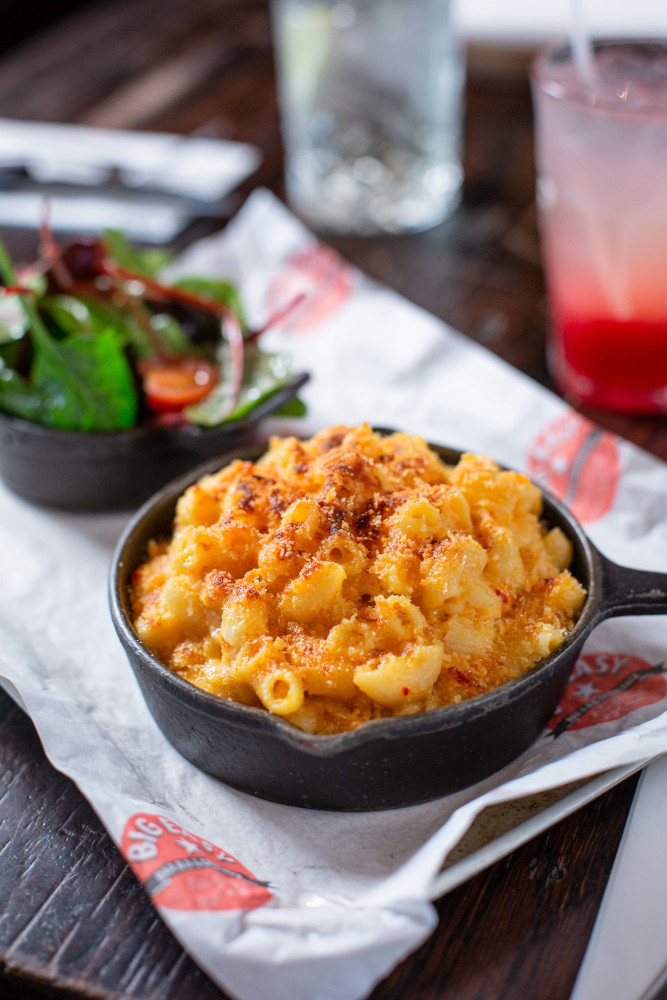
Freshly washed ingredients always display more vibrancy and life, and their shine can really catch the light and lift your image. Also think about complementary colours that work with the hero dish and won’t overpower it, such as in this shot of mac and cheese:
What is food photography?
It goes without saying: your photos should make the viewer feel hungry. You want to be able to instil the desire to eat whatever it is you’ve shot – it’s as simple as that.
For me, cooking has always been a passion. I’ve watched endless cooking shows on TV, cooked my way through cookbooks cover to cover, and just tried to learn as much as I could about food. Discovering photography a few years ago and teaching myself from scratch gave me a real drive and determination to combine these two passions of mine. I gave myself the goal to become a food photographer. Working hard, I was able to make this a career for myself, and I can gratefully say that I truly enjoy every shoot I work on.
How to edit food photography?
Generally my process for editing photos is very similar each time. For ease and uniformity in my workflow (drilled into me while I worked at the TV Post House), I’ve created a zip folder which opens up all the folders I’ll need for a project, quickly and easily. I rename the top folder according to the client and job. The folders within are as follows:
- 01_RAW
- 02_SELECTS
- 03_LR
- 04_PS
- 05_EXPORTS
I will then create a project in Lightroom with the same name as the client and job top folder, and save it in 03_LR. My next step is to import and select my images from the 01_RAW folder, and move these selects to the 02_SELECTS folder while importing into the project.
Now for the edit. Food, of course, has to look natural, so it’s mainly about balancing the colours and making each ingredient look the best it can be. You want to boost the colours a little, but not overly. I tend to do as much as I can in Lightroom, and once I am mostly happy, I will open the image in Photoshop.
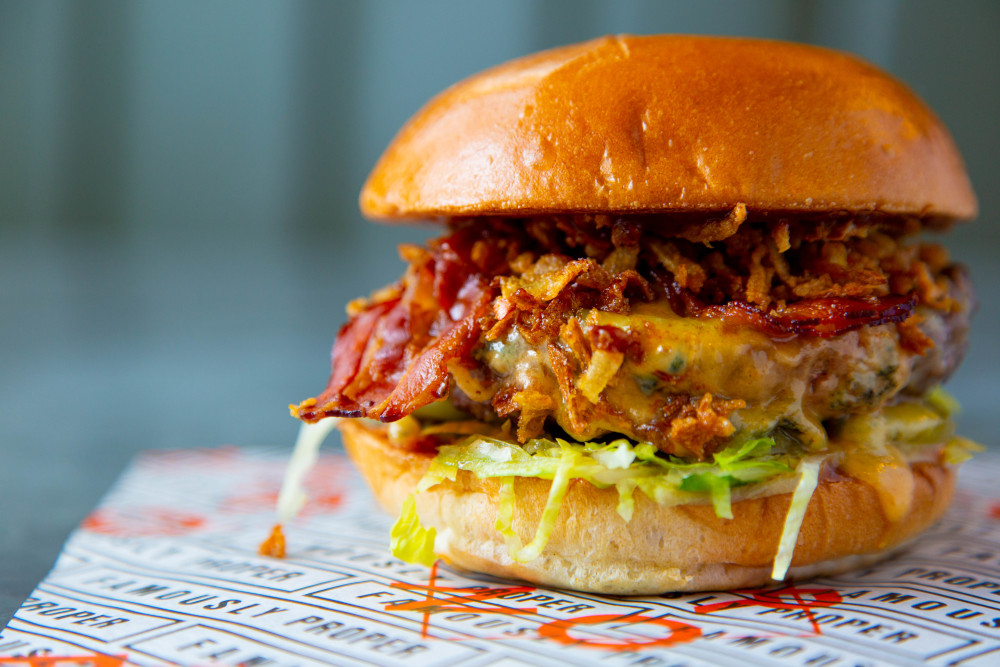
I start with a corrections layer where I fix any kind of imperfections with the spot-healing brush tool. If the image could do with a little sharpening, I will duplicate the image and apply a high-pass filter, before setting the blend mode to soft light. My next step is to enhance certain colours. For example, I shot a burger recently in which the yellow of the melted cheese was a little lost and too subtle:
To improve this, I created a solid colour layer of a cheesy yellow and then created a mask; next, I inverted the mask, and then used the paintbrush to paint the yellow onto the cheese. It looked very harsh at first, but I was able to use this as a guide to see where I had painted. Once the cheese had been painted yellow, I changed the blend mode to soft light and lowered the opacity of that layer to make it a little more subtle. I then saved this as a Photoshop file in 04_PS. Back in Lightroom, I could cycle between images to see the difference.
How to approach restaurants for food photography?
A few years ago, I started working for Street Feast, creating video and stills content with their marketing team. Through that job, I had the opportunity to meet a lot of street food traders. What I learned was: introduce yourself. Take photos of their food (don’t expect to have it for free). Get a contact name and number. Finally, once the images are edited, send them over. This is definitely a great way to be remembered and recommended in the future. When they need a photographer, you’ll no doubt be on their minds.
I’ve actually found a fair bit of success by finding places I’d like to shoot on Instagram and messaging them. It’s a great way to see what kind of content they already have, and your portfolio is basically on your page anyway so they can quickly see your work.
How to shoot food photography at home?
If you want to shoot food at home (especially relevant right now) you don’t actually need that much kit to get started. A good surface and a window are all you’d need as the bare minimum.
For a simple and easy setup, I’d place my surface next to a window with decent light coming through. Next, I’d place my dish in a position where the daylight is almost a backlight, or just off to the side. Opposite the window, on the other side of the subject, I would place a white reflector or white card to bounce the light back to the dish to lift the shadows. Using props such as chopping boards and knives can give a natural, homely feel while also breaking up the image a little and bringing some texture and colour.
It can also be great to build up a bit of a story around the dish with a few of the ingredients from the recipe. Also, simple and clean images can work well to really highlight the dish. For example, the image below was shot for Yum Bun next to a large window on a slightly rusted metal sheet. Super simple but I think the balance of colours works really well.
How to set up lighting for food photography?
There are lots of different ways to light food, and it is all dependent on what kind of style or mood you’re going for, as well as the type of dish that you’re shooting.
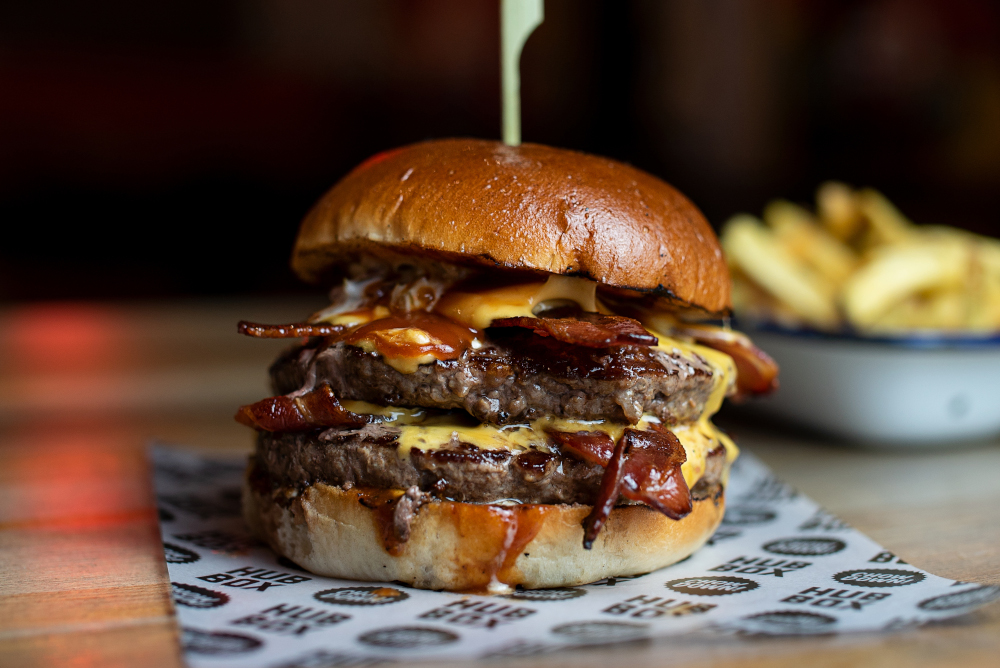
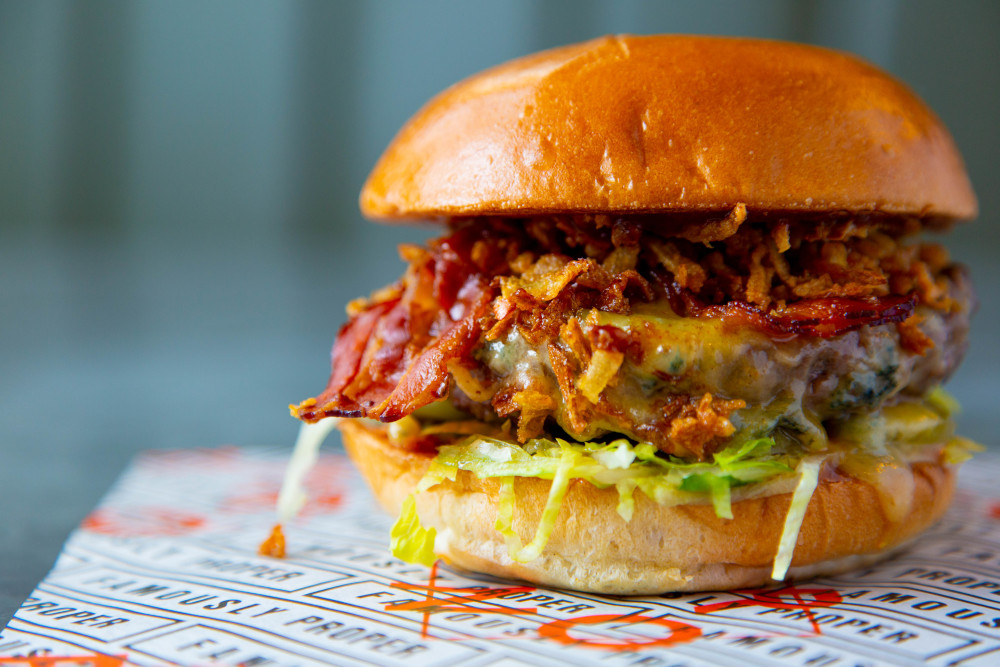
For example, I like to shoot with a side-backlight with a softbox modifier and use a reflector on the opposite side to lift the shadows. This works well when shooting at a 45-degree angle or for a top-down shot. However, this won’t really work well with tall dishes, or if you’re shooting from a low angle. A burger for example, suits side lighting, as it allows you to highlight all the layers and fill in the shadows with a reflector. For this, I like to use a reflector with different sleeves; the silver side can brighten your image, the gold can add warmth, the white side can subtly lift shadows and the black can increase them. Take as an example this shot of a burger:
I lit from the side and front to get those beautiful highlights catching on the edges of the bacon, burger, sauce and cheese. You can see the direction of my light from the glow on the bun A low aperture also helped soften the rest of the image, and I was really happy with the result of this simple light setup.
How to plate food for photography?
Plating for food photography can be tricky. As much as I can, I like to plate in front of the camera. This makes things look fresher, and means the food is less deflated or wilted. Another reason I do this is that when that final sauce shot goes on, you can quickly get those beautiful mid drip shots without missing the perfect moment.
It is advisable to buy a long lead, so you can connect your camera to your laptop for tethered shooting. This way, you’re able to set up the dish while looking at what’s in frame as a reference without having to check the back of the camera all the time.
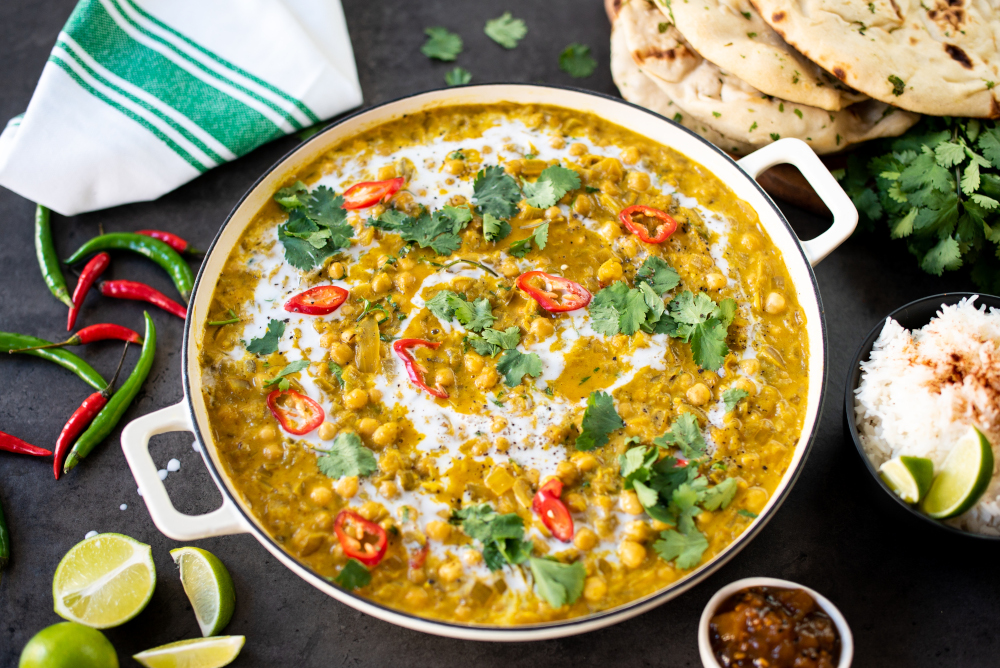
This curry was set up and styled by using live view on a laptop, with everything in place except for the garnish. As soon as I was happy with the styling, there was a final sprinkle of coriander and chilli and a swirl of coconut milk, which I snapped before it got too spread out in the curry sauce.
What you need for food photography?
I tend to shoot mostly out on location in restaurants and kitchens, so I like to have a lightweight and portable kit. Firstly, I think a good camera backpack or case is essential. The many compartments of a dedicated camera bag are great for keeping your kit organised.
I like to use an off-camera flash with a softbox. I’ve found this the most affordable and lightweight way for me to work. Also, one of the handiest tools I own is a reflector, and I have been building a little food-styling toolkit that includes a paintbrush. This is great for bringing something back to life with a little oil if it has been sitting out too long and dried up. In the same kit I have large tweezers for fine tuning small ingredients like garnish.
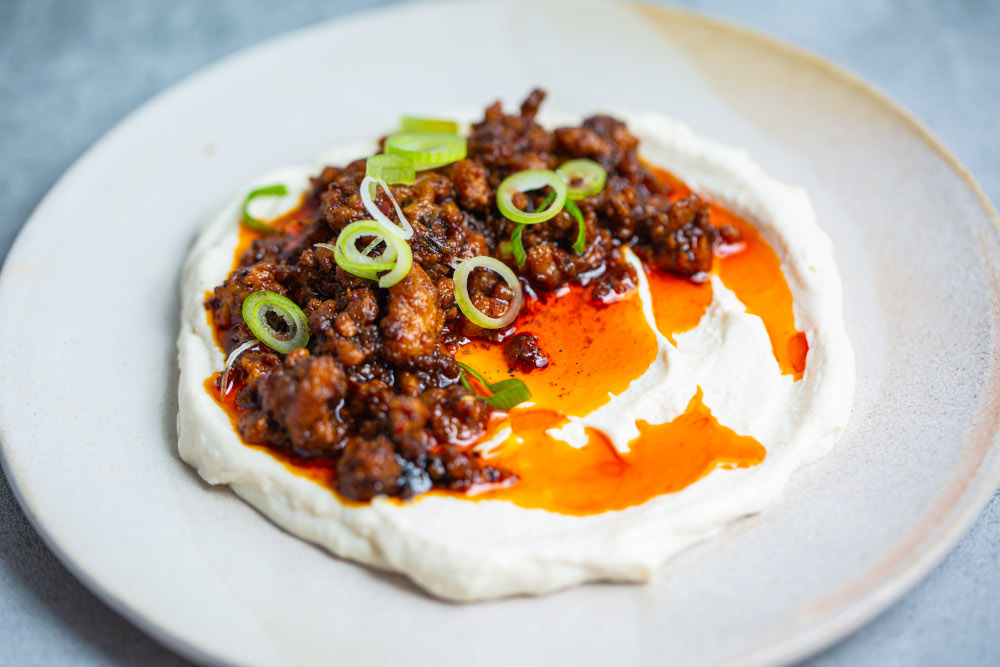
For this image. I had to place the sliced spring onion, and using the tweezers was the perfect way to do so. A small, thin palette knife (the type you’d use to ice a cake) is great for moving things around, such as layers of a burger. I also have a small spray bottle which I fill with water to freshen up salads etc. A few spots of water look great on the skin of a tomato!
Where to buy food photography props?
It’s always handy to have some backdrops and props to hand, so I always keep an eye out for what’s on offer when I’m out and about or on holiday. Picking up quirky plates or cutlery can make a big difference when it comes to your photography work.
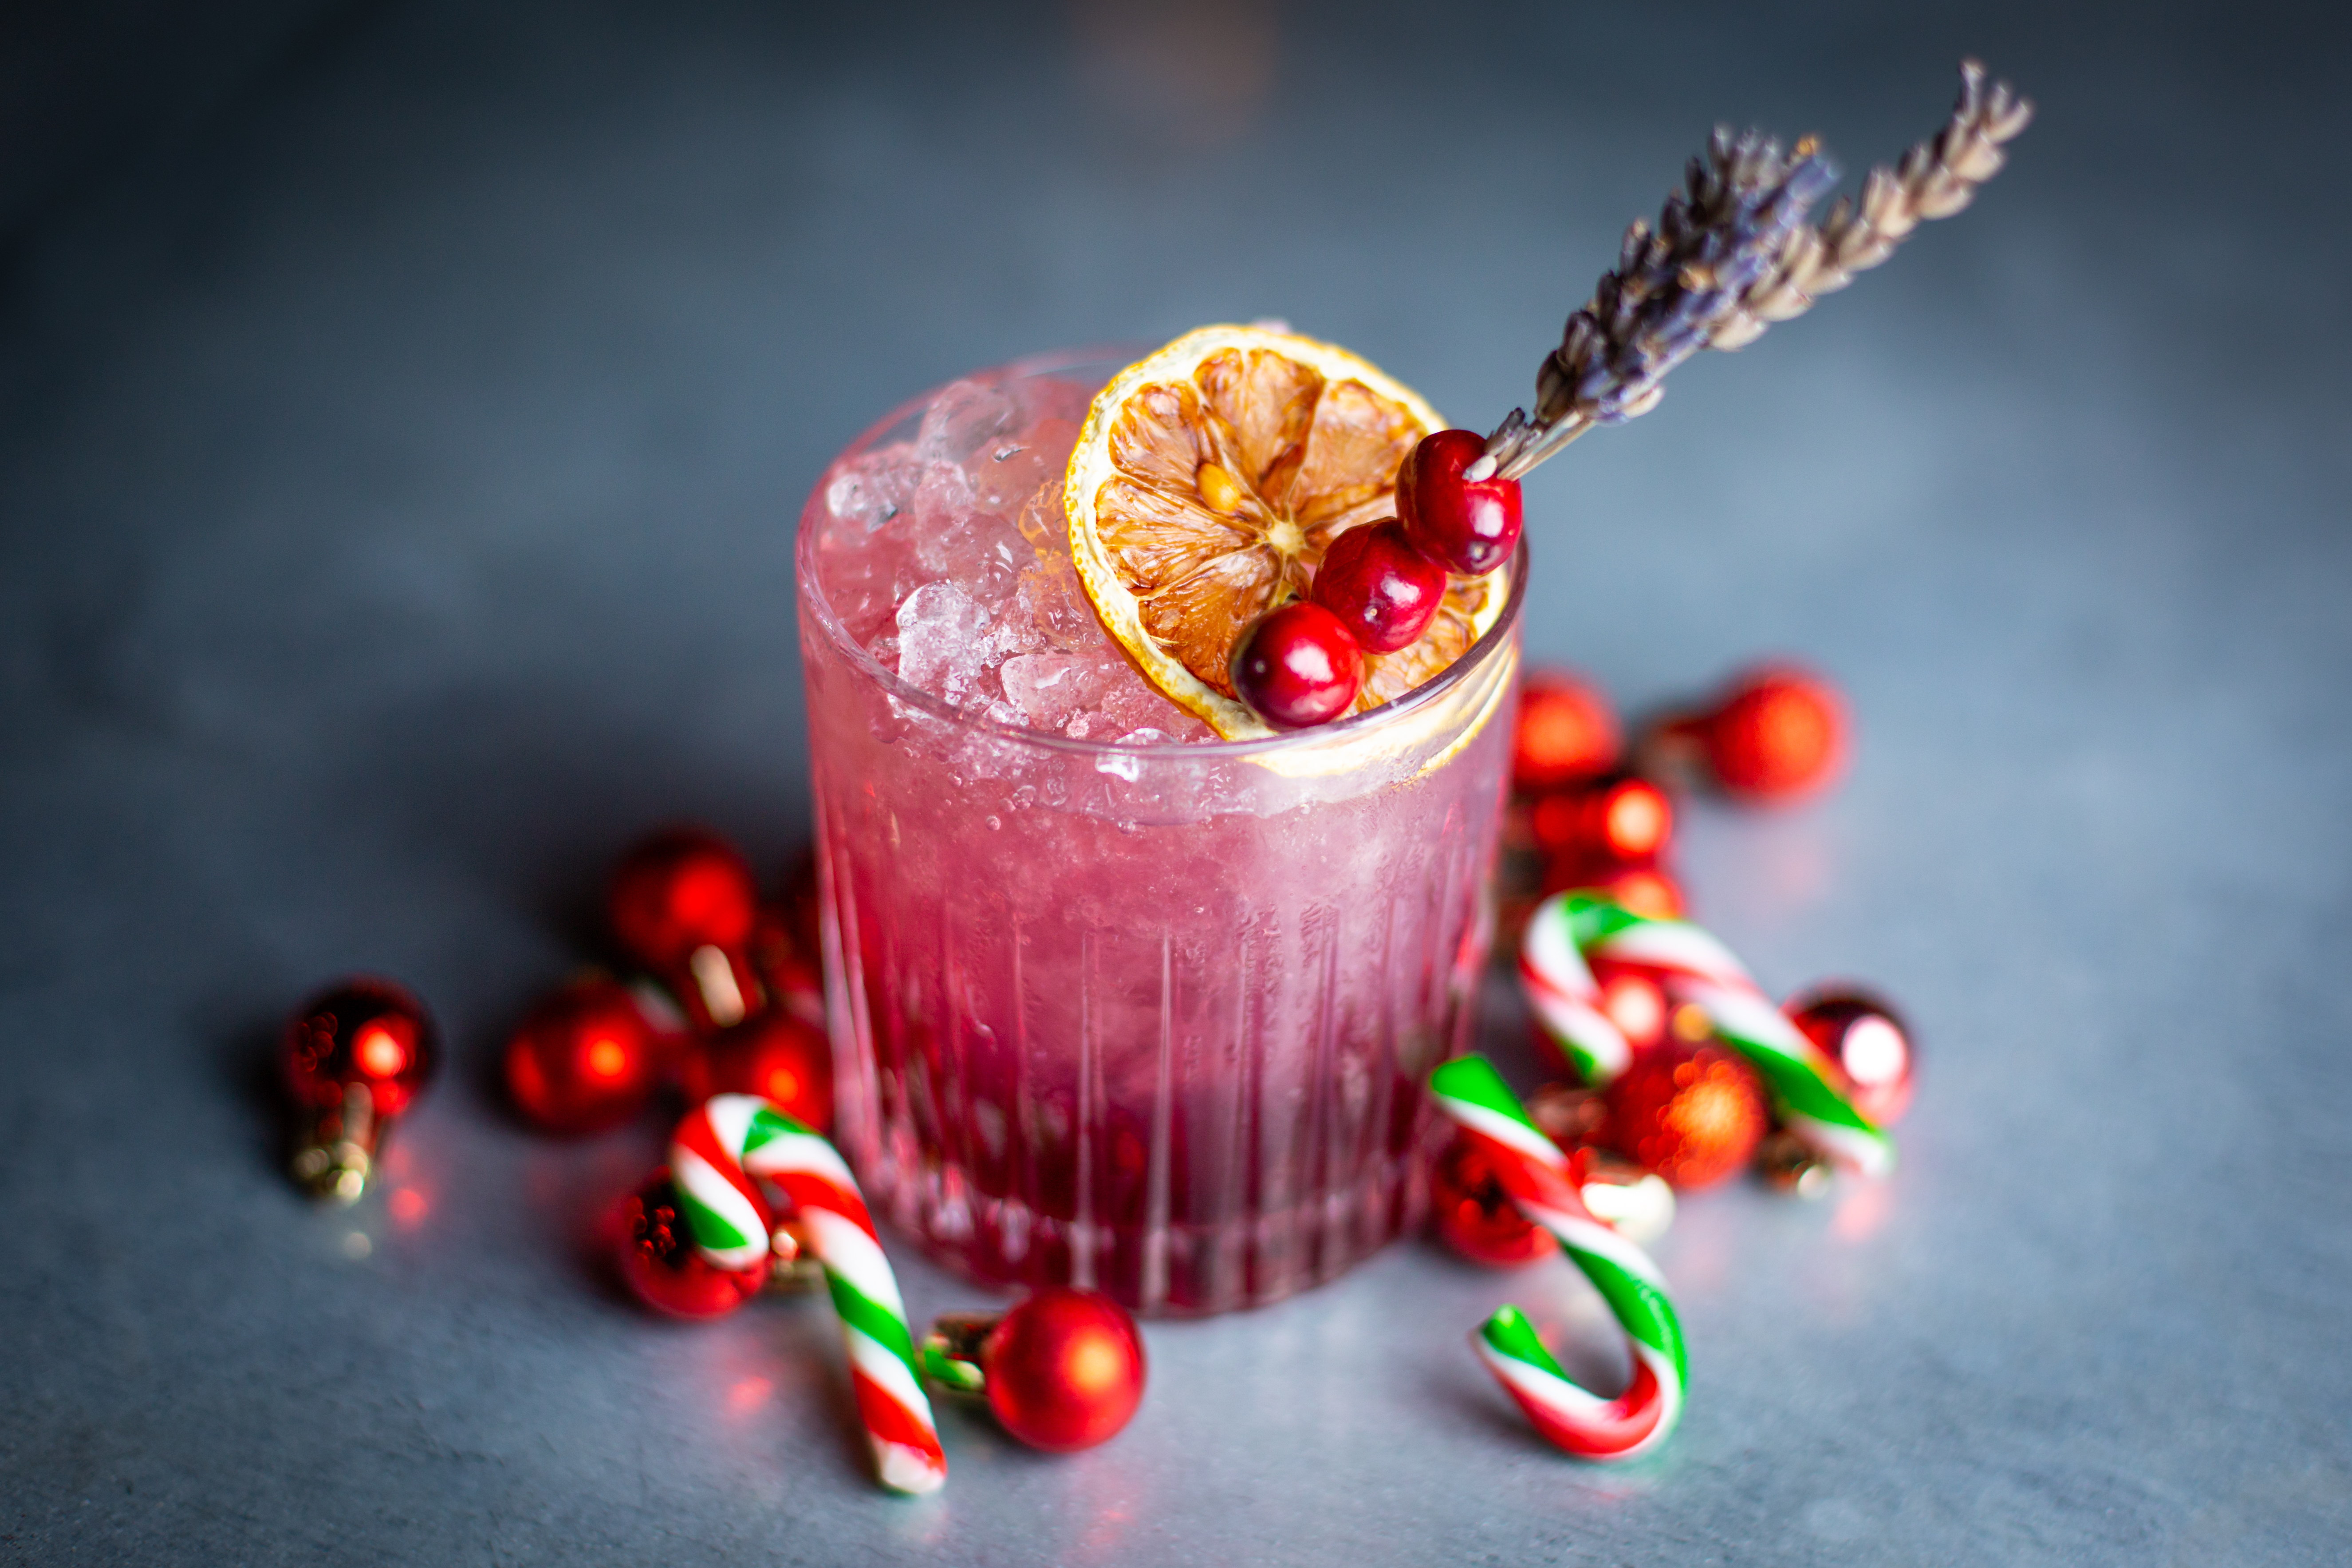
For this image, simple Christmas props gave a nice seasonal touch. I’ve also found quite a few interesting pieces on Etsy, so I’d recommend browsing there occasionally too.
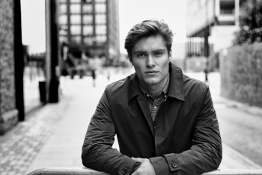
Will Nobes
Will Nobes is a photographer based in London. He specialises in photographing food, portraiture, events, dance, branded content and more.

Sign up to our newsletter today!
- Subscribe for exclusive discounts and special offers
- Receive invitations to our insightful Wex Events
- Get the latest news and know-how from our experts
