It's possible to totally transform your portraiture with just a single light. Jake Hicks gets you started
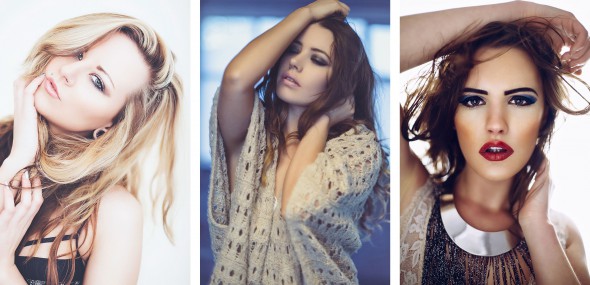
All images by Jake Hicks
We all start somewhere. No one suddenly wakes up one day and thinks: "I want to start shooting with off camera flash – I’d better buy five flash heads".
Most of us graduate to using supplemental lighting in our photography by investing in a single speedlight first. Then, if we find ourselves limited creatively, we add another one or two, or even make the step into studio strobes.
This article is going to jump in before that second step and see if we can’t eke out a little more life from that first single light by looking at three spectacular setups that can be created with a single light.
Before we get started, I'd like to also preface this piece by saying that although I shoot solely with studio strobes now, and all of the following images were shot with strobes, the three lighting techniques I'm about to share can all be achieved with speedlights and the relevant modifiers just as easily.
The only differences will be the quality of the resulting light, but that's a topic for another day.
Setup 1 – Bounced light
This lighting technique is one of the easiest and simplest to achieve, but every time I show it to people I continue to be astonished by how impressed they are with the results.
What you will need:
- 1 flash
- 1 white wall
- Optional: 1 fast lens (a lens that allows for apertures of f/2.8 or wider).
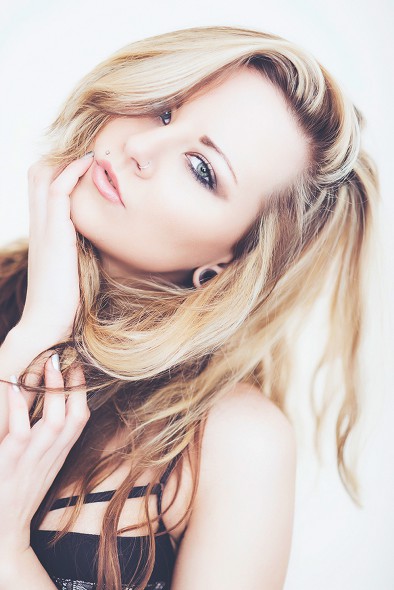
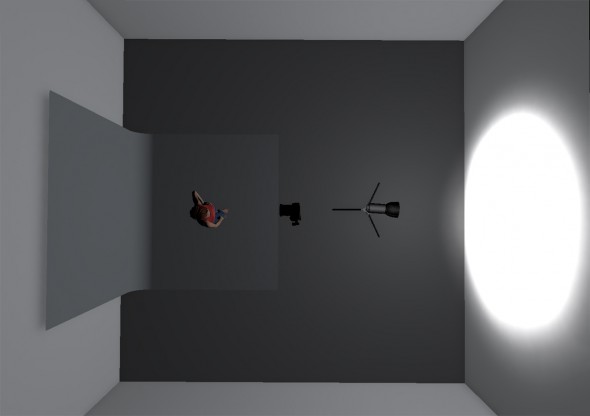
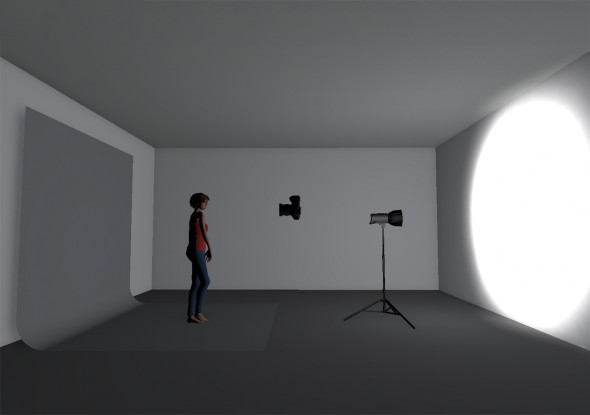
The technique is very simple. All you have to do is to find yourself a white wall and position your flash in front of it, pointing towards it. The trick is to position the flash far enough back that the light has time to spread and cover a very large area of the wall.
Now place your subject on the opposite side of the room, looking back towards the flash and the wall, and position yourself between the subject and the flash.
Because we've placed our flash to fire at the wall, this large white surface now becomes our light source; as a result, this creates a very soft wraparound lighting on our subject as it falls onto them. If you've ever used a softbox before, you'll know that the large light source it creates makes for a very flattering light on your subject. Well, our huge white wall is now acting as a giant softbox.
This technique works especially well when coupled with a fast lens with a wide-open aperture of at least f/2.8. The soft, shadowless lighting pairs well with the shallow depth of field created by the wider apertures.
Setup 2 – Colour temperature orange
This lighting technique requires a little more technical knowledge to fully understand as it asks you to manually play with the white balance settings on your camera. But if you can get to grips with what's actually happening here, you can open yourself up to a whole world of creative possibilities, so I believe it's certainly worth the effort.
What you will need:
- 1 flash
- 1 colour temperature orange gel
- 1 lighting modifier like a softbox or beauty dish
- Some daylight – you can acquire this in the time-honoured fashion by going outside, but a window behind your subject will work just as well
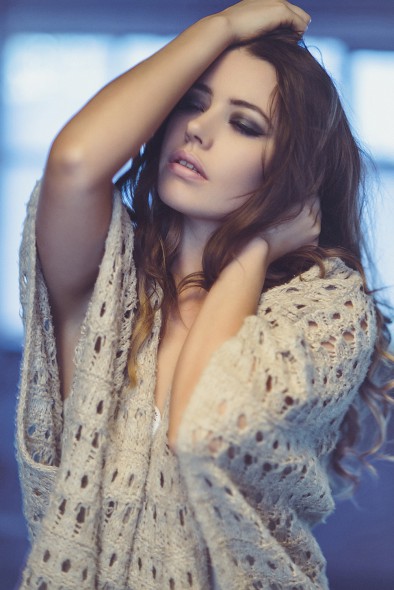
I'll start off by stating that the strong blue colour you see in this setup’s image has not been added in post-production but rather created in-camera at the time of taking the picture.
To do this, you essentially have to trick your camera by changing the white balance before you take the shot. Most modern cameras have the ability to manually dial in a white balance value via a Kelvin number; if your camera doesn't have that option then you can achieve the same thing by changing the white balance mode to the little lightbulb icon.
So what does changing the white balance do? The white balance tells our camera what colour cast is present in our shots – without this our images could come out with a cold or warm colour cast, looking unnaturally blue or amber. For example, if we take a picture in daylight or with flash then we tell our cameras to take pictures with a Kelvin value of around 5000K. Conversely, if we are taking pictures indoors under tungsten lightbulbs, we tell our cameras to capture the shot at a Kelvin value around 3000K.
This might sound complicated, but thankfully most of the time our cameras are doing it all automatically via AWB (auto white balance) so we don't have to worry about it. But if we take control of the white balance for ourselves, we can create some very interesting shots indeed.
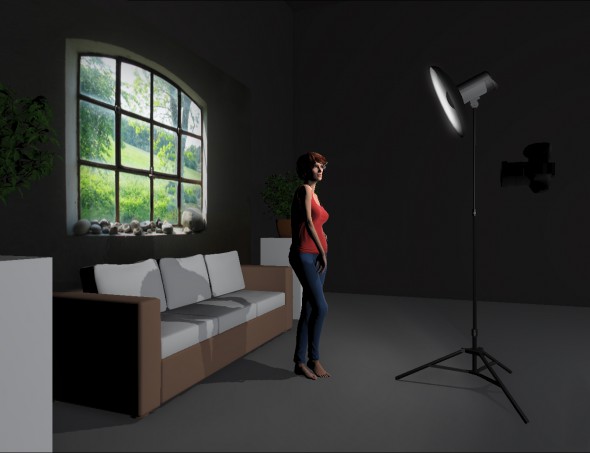
Start off by placing your subject either outside or in front of a window with daylight clearly visible behind them like I've done in this example. Next you'll want to setup your flash and modifier, but before you do, be sure to place a CTO (colour temperature orange) gel inside or over your modifier so that it's covering all of the light that’s coming out. Essentially you’re making your flash bright orange, but don't worry – we're going to counteract that orange effect by manually adjusting the white balance like we mentioned before.
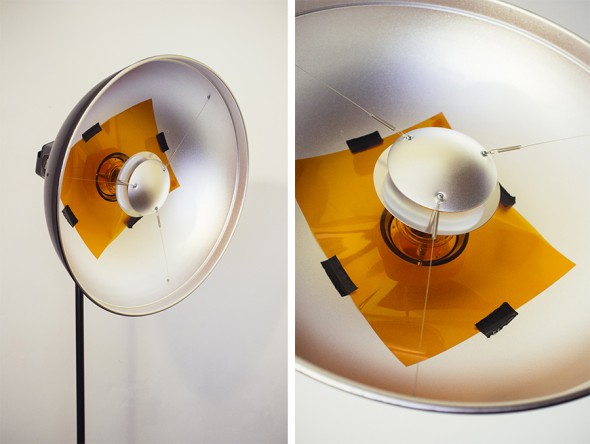
In your camera’s menu, change the Kelvin to around 2500-3000K – a cool cast. Now take a picture of your subject with the flash firing, and make sure to compose the shot so that you can see some daylight behind the model too. If done correctly, you should see that the background has turned blue but the model is correctly coloured thanks to our camera’s white balance adjustment.
Setup 3 – Reflector ringflash
This is one of those lighting setups that you'll kick yourself for not knowing sooner, and it's almost unbelievable how good the shots look from a setup that is so simple and cheap to implement.
What you will need:
- 1 flash
- 1 large softbox
- 1 silver reflector
Deep breath. I'm just going to come out and say it. We're going to cut a hole in the middle of your lovely reflector.
So, with that out of the way, you may want to order another one (Gratuitous link – editors) because once we cut the hole in that reflector, it's really only good for this specific technique. But trust me when I say the resulting shots are well worth it.
For this technique, we'll need a medium sized silver circular reflector – the one I used here was 80cm in diameter – and the first thing we need to do is to cut a hole right in the middle of that thing.
This is pretty simple: first place something roughly in the centre (it doesn't need to be super accurate) and draw around it. Next, place something underneath so you don't cut a hole in the carpet or score your nice hardwood floor, and then carefully use a craft knife to cut out the centre hole in the reflector. The size of the hole is up to you, as long as it’s large enough for you to poke your lens through it.
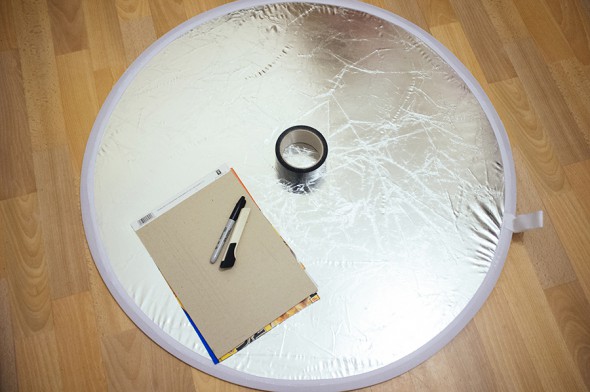
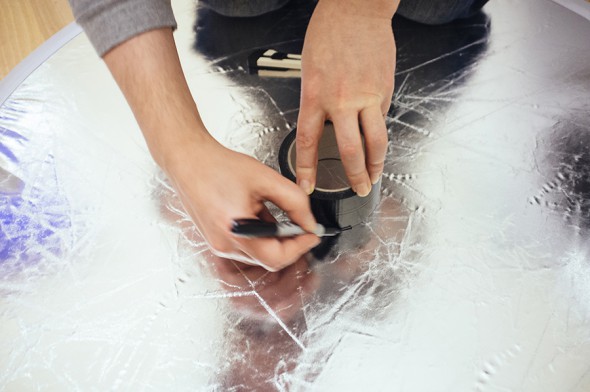
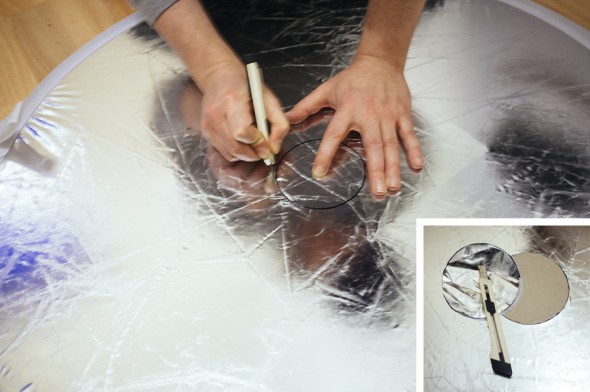
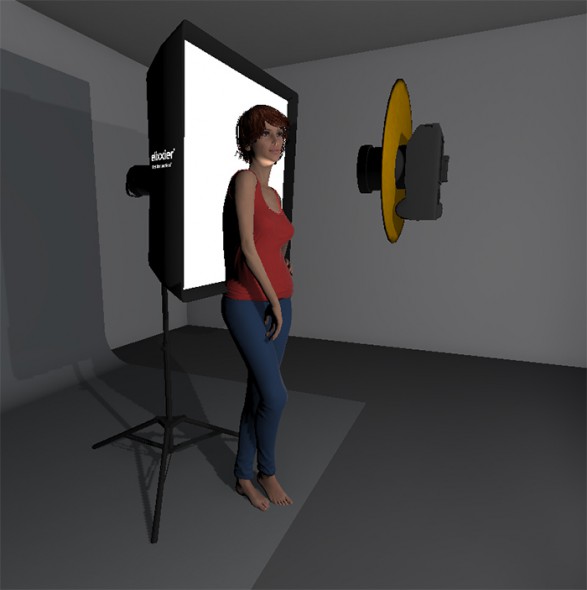
Next, we need to set up our light with our softbox on it. For this shoot I used a large softbox of around 100cm square – essentially it just needs to be wide enough so that the model can comfortably stand in front of it without blocking out all of the light.
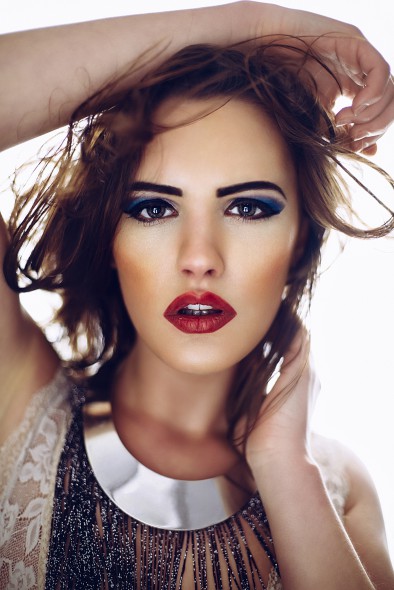
Now that your subject is standing in front of the softbox, you simply need to hold your reflector up in front of them, making sure that the silver side is facing them, and take some shots.
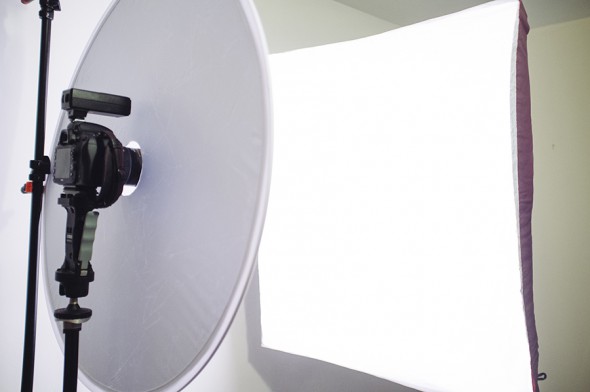
What will happen is that the light from the softbox will wrap around the model, hit the reflector that you're holding, and then bounce back to illuminate them. The resulting light you get from this is a stunning look, flattering on the model with light that appears to be coming from everywhere. This is definitely one to try!
There you have it. All it takes is a little creativity for a single light to totally transform your shots. Good luck!
Want to learn more about portraiture? Watch our video series with pro portrait photographer Hannah Couzens
About the Author
Jake Hicks is an editorial and fashion photographer specialising in keeping the skill in the camera not just on the screen. jakehicksphotography.com
Related articles
Focus on Family Portraits
How to Shoot Black and White Portraits
Five Handy Portrait Lighting Accessories that Make a Big Difference

