Want this stylish look for your photos? James Abbott explains a straightforward Photoshop process to replicate the Gingham Instagram filter
The Gingham Instagram filter is a popular effect that has been used on millions of photos taken all around the world. But one of the problems with Instagram filters is that you can’t easily apply them to your full-resolution images. The obvious answer is to emulate them in Photoshop, and that’s exactly what we’re going to do here with Gingham.
Before you get started you need to identify the characteristics of the filter you intend to emulate. And with all the filters there are usually around four key identifiers. For Gingham that’s muddy highlights, brightness, a slight haze and a subtle warm up of the tones by carefully applying red and magenta to selected parts of the image.
Love them or loathe them, app filters from the likes of Instagram and VSCO have had a profound effect on the way people now process their images. And I’m not just talking about snapshots taken on a mobile phone. Their influence has spread to all walks of photography, regardless of the camera used, and for now they’re as popular as ever.
To look at the characteristics of an Instagram filter without uploading an image to Instagram, send an image to your phone or smart device and then switch it to Airplane Mode so it’s not connected to the Internet. Then load the image into Instagram and select the desired filter before clicking on Share. You’ll then see a message that the image wasn’t posted, so click on the row of three horizontal dots and select Discard Post. You can now switch Airplane Mode on, and after navigating to the Instagram image folder on your phone, email the processed image to yourself so you can open it up in Photoshop on your computer. It can sometimes help to do this with a couple of different images to see how the filters affect them.
Now, here are the steps for recreating the Gingham filter in Photoshop...
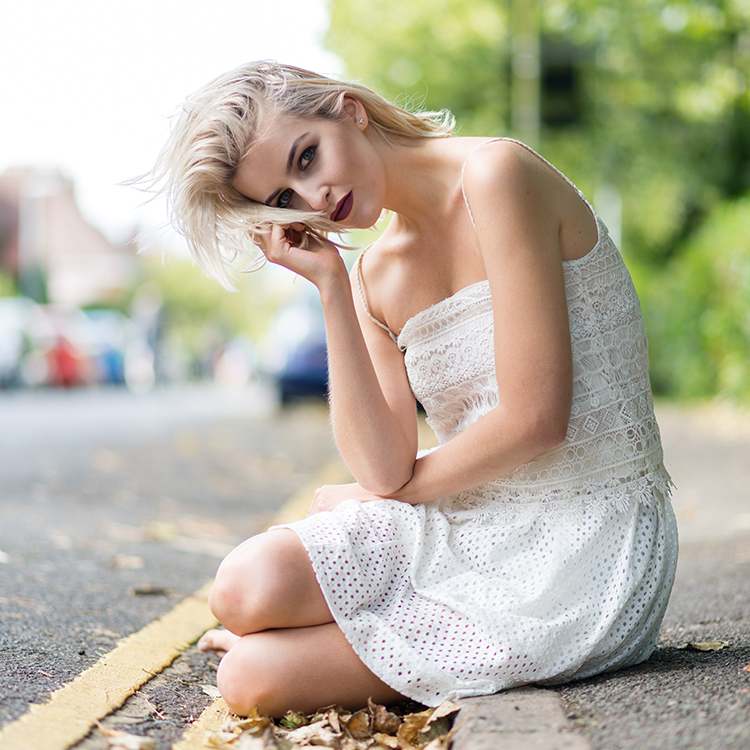
Our starting shot
1. Crop your image
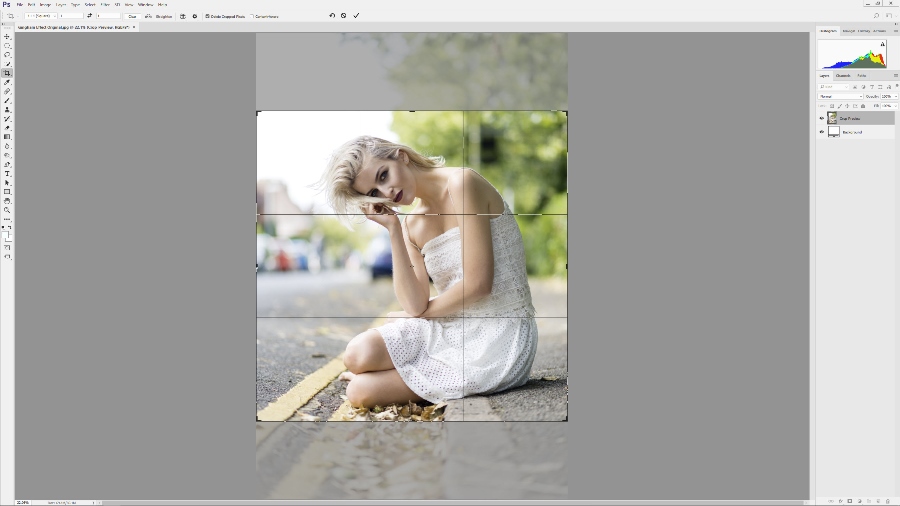
Open your image in Photoshop and press C on the keyboard to activate the Crop Tool.
Now go to the dropdown menu in the top left area of the Photoshop window and select 1:1 (Square) from the list of options. To move the crop guide left mouse click within the guide and drag into position. To resize the crop guide drag the corner points in or out. Hit Enter on the keyboard, or click on the tick at the top of the Photoshop interface to commit to the crop.
2. Muddy the highlights
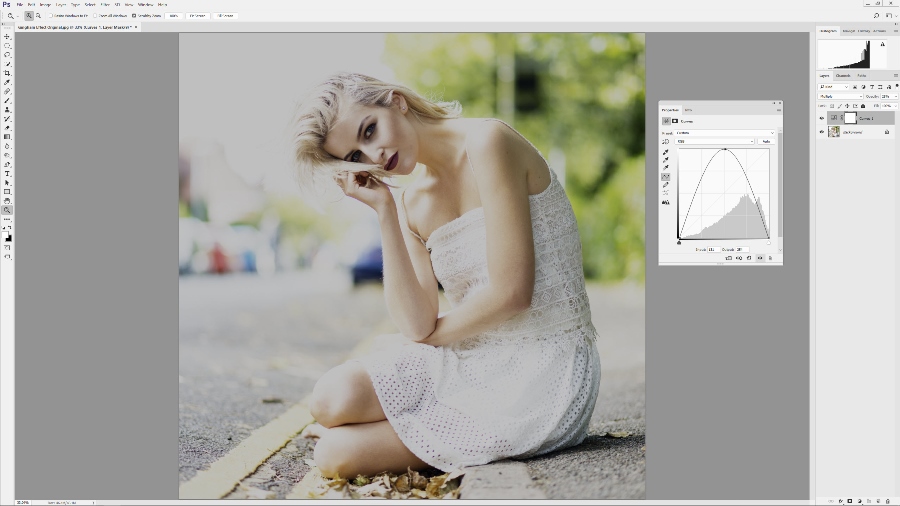
Click on the Create New Fill or Adjustment Layer icon – it’s the half-white, half-black circle at the bottom of the Layers panel – and select Curves from the options. When the window opens, drag the point in the top right corner down to the bottom right corner.
Next, left-click in the centre of the horizontal curve and drag the point to the top of the grid. Change the Blending mode from Normal to Multiply, and set the Opacity of the Layer to 25%.
3. Brighten the image
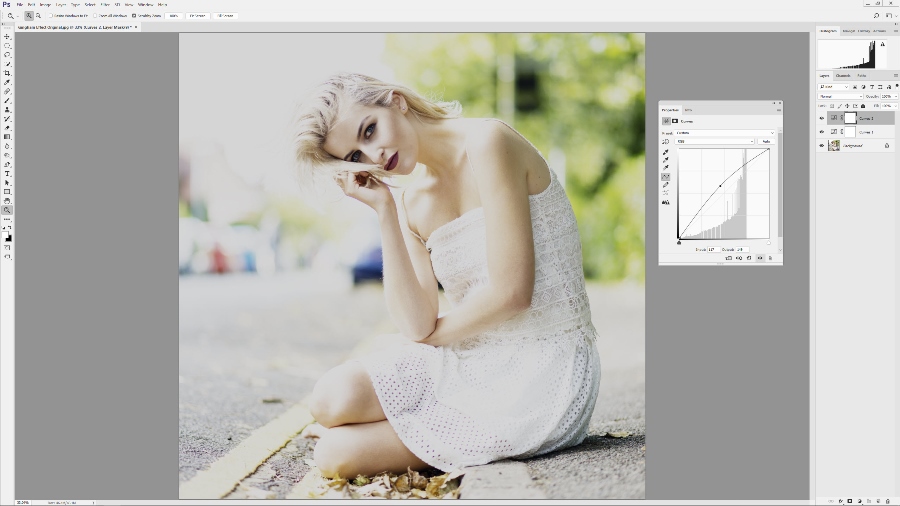
Create another Curves Adjustment Layer and left-click in the centre of the Curve to place a point. Now, by dragging up and to the left you will brighten the image. The position of the point placed here was Input: 117 and Output: 149. If you accidently place a point you don’t want or need, simply left-click on it and drag it from the Curves grid to delete it. Alternatively, pressing Ctrl+Z may take you back that one step and remove it.
4. Apply the colour effect
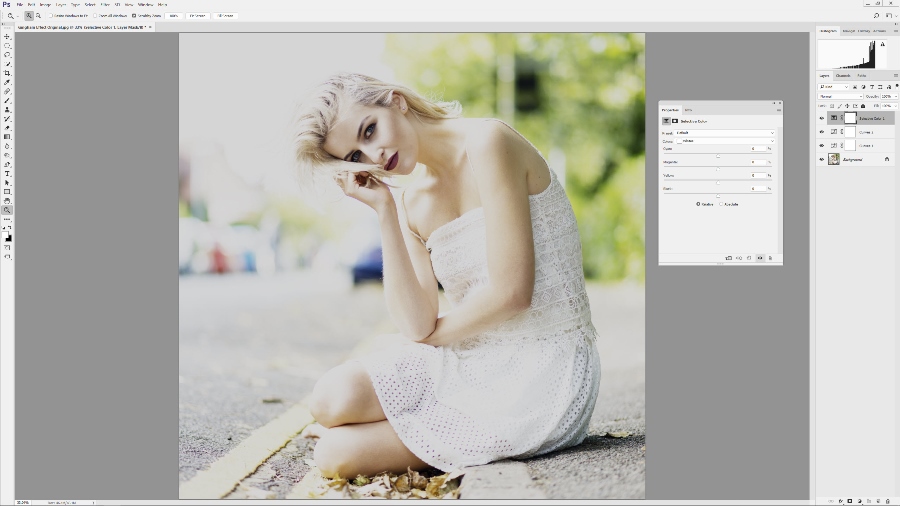
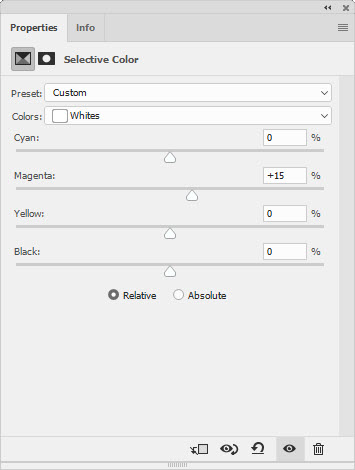
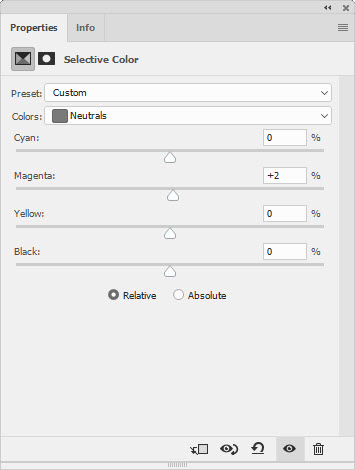
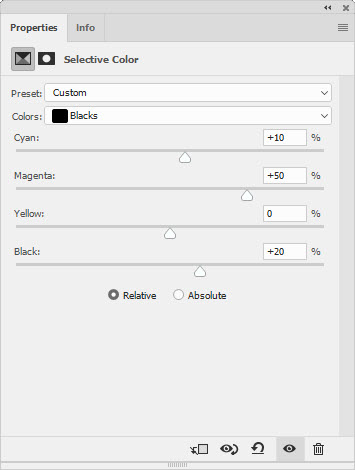
Click on the Create new fill or adjustment layer icon and select Selective Color from the list of options. When the dialogue box opens use the dropdown menu to select Whites and set Magenta to +15. Select Neutrals and set Magenta to +2, then choose Blacks and set Cyan to +10, Magenta to +50 and Blacks to +20 before closing the window. Your image will now have the cold-looking Gingham colouring effect.
5. Add an overall haze
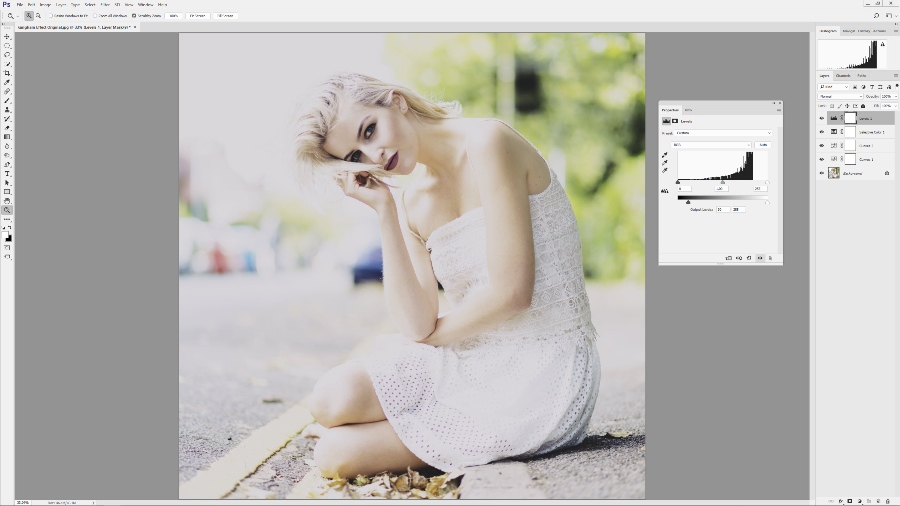
Go to the Create New Fill or Adjustment Layer icon and select Levels from the list of options. When the dialogue box opens, drag the Black Output slider, which can be found below the black-to-white strip below the main Levels histogram, to 30. This will lighten the blacks in the image slightly and apply an overall haziness. At this point you can save the image as a TIFF to maintain all of the Layers, or as a JPEG to flatten it down.

The final result
About the Author
James Abbott is a Cambridge-based landscape and portrait photographer. He’s also a Photoshop expert with years of experience teaching Photoshop. Check out his work at www.jamesaphoto.co.uk.
Related articles
How to Become an Instagram Sensation – Hannah Argyle
How Instagram Helped Sean Byrne Become a Travel Pro
Why Use Instagram?

