
With the best accessories for wildlife photography, you can massively improve your chances of bagging a great shot. Even the smallest things, like an inexpensive rain cover that helps you stay out longer, or a small bean bag that keeps your lens steady, can sometimes be just what you need in a pinch, and ultimately make a huge difference.
So, we’re put together a quick guide to the essential wildlife photography accessories. Everything on this list is relatively inexpensive, and most of these items won’t take up much room in your kit-bag. You may not need everything on this list for your particular brand of photography — but we’re willing to bet that at least a few things here could be of use.
If you don’t believe us, check out our interview with wildlife photography pro Tom Mason, where he runs through his kit bag essentials, including many accessories featured on this list (though if we’re honest, he tends to use the fancier, pricier versions). You can also see our guide to the best lenses for wildlife photography if you’re looking for ideal glass.
Our top picks

If you’ve visited a nature reserve or wildlife centre, you’ll know how impractical using monopods and tripods can be if you’re holed up in a hide. Bean bags are the perfect solution to this problem, allowing you to safely rest and support a long lens on a window ledge or post.
This Wildlife Watching Bean Bag has a velcro opening along the length of one side so it can be filled with rice, corn or any similar material that moulds around the shape of the lens’s barrel, greatly aiding its stability.

If you’re beginning to specialise in wildlife photography, then the chances are that at some point you’re going to pick up a dedicated telephoto prime or zoom to give you the reach needed to capture images of distant subjects.
However, most camera backpacks aren’t large enough to accommodate these bulkier optics, and the carry cases that they’re shipped in aren’t especially convenient if getting to a location involves walking. This is where Vanguard’s Alta Sky 66 steps in: it’s a camera backpack designed from the ground up with large lenses in mind.
The main compartment of this bag offers enough space to fit a pro-DSLR with a 600mm f4 lens or even some 800mm optics attached. An adjustable, well-padded cradle supports the camera body in the centre of the bag and secures the lens making sure that it’s well protected, particularly around the delicate mount connection.
The bag’s ergonomic harness system is fully adjustable and features a well-padded and breathable 3D back for comfort. Adjustable shoulder straps can be set to one of three height positions, perfectly contouring to the user’s back and torso, while an adjustable sternum strap and supporting waist belt can also be found. If you find yourself regularly using telephoto primes and the like, then the Alta Sky 66 is for you.
Also available in: medium and large
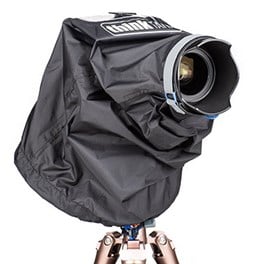
While weather-sealing in cameras and lenses has come a long way, many are still not fully equipped to survive an absolute soaking, and some measure of rain protection can be hugely useful to make sure your gear isn’t compromised while shooting outdoors. The Think Tank Emergency Rain Cover is the perfect choice; it’s inexpensive, easy to use, and comes in three sizes for different setups.
The small version is designed for smaller interchangeable-lens cameras, with lenses attached the size of a 24-70mm or 16-35mm zoom. The medium version fits large cameras with lenses like a 70-200mm or a 24-70mm. The largest version is probably going to be of most interest to wildlife photographers, as it is suitable for use with long lenses, from a 150-600mm zoom to a powerful 600mm prime. It fixes on by attaching to the hotshoe and lens hood, and features a window for viewing controls and LCD, meaning the camera can still be operated while covered.

Take the next step up from those budget garden binoculars that you’ve been using and consider investing in Celeston’s Trailseeker 10x42.
Featuring a lightweight magnesium alloy frame that’s durable and fully waterproof, these high-level binoculars with 10x magnification have phase- and dielectric-coated BaK-4 prisms that dramatically increase light transmission for unrivalled image quality and views. Tripod-adaptable, the Trailseeker 10x42 binoculars also offer a minimum focusing distance of just 2.5m for up-close observation of subjects.

Also available for: Canon, Nikon, Sony, Fujifilm and Olympus/Panasonic
When you’re starting out with wildlife photography, it’s easy to get blurry eyes and become attracted to those huge shiny lenses that you think you need. Instead why not get into wildlife photography in a different way and move your camera closer to your subject whilst keeping your distance? The great thing about this way of shooting is you probably don’t need a new camera or lens, but instead just a remote release.
Now these little accessories come in a variety of models and range in prices from tens to hundreds of pounds, but all work around the basic principle of transmitting the triggering signal from a handheld unit to a camera positioned where you think your subjects will appear. You will most likely want a radio trigger as they work over longer ranges and don’t require line of sight to work, perfect for outdoor use or for tricky positions.
If you want to get a little more technical, more recent cameras and systems can also transmit the live data from the camera to a handheld device. Many allow you to alter and change exposure settings, focus points and more through live view for the perfect shot.
While many brands offer their own proprietary remotes, the Hahnel Captur is a good option that’s compatible with a broad range of cameras. It provides up to 100m range of wireless transmission, allowing you to keep a safe distance from your camera (and elusive subjects)

Nature photography covers all types of subjects and for those of you interested in the smaller creatures and plants of the world, a reflector can be an excellent way of throwing some additional light into your subject for creative images.
Simple and relatively cheap, these fold-out disks have a reflective surface on either side (often in a variety of colour casts) for adding light to your images. For most purposes, a gold/white reflector creates the most natural-looking results, as silver reflectors throw a harsher, punchier and less natural looking light.
With reflectors being rather large and unwieldy at times, holding them in position (if you don’t have an assistant handy) can be tricky. Wimberly has come to the rescue, however, with the Plamp. It’s a small clamping arm that can help hold accessories like a reflector in place, leaving your hands free for composing and working the camera.

With some subjects, it’s important to stay concealed in order to get close-up images. Wearing camo clothing often isn’t fully effective, as even though the patterns help you to blend into the environment, they still don’t conceal your body shape – this is where a bag hide comes in!
Bag hides are bags that, well, hide you. A throw-over, cape-style design made of camouflage material, they are positioned over the photographer and tripod, disguising the body shape, blending you into the background. Designs come in waterproof or lightweight models and are great for staking out subjects. Use them with a compact folding chair or ground level chair for added comfort and you’ll be able to work for hours at a time. Another benefit is that bag hides create a small internal micro-climate, meaning they’ll also keep you warmer on those cold days out on location!
The Wildlife Watching C33 bag hide is a great choice — light enough to throw into a backpack and carry with you to a location. It’s camo-coloured for concealment, and has a large lens opening with a velcro adjustment.
FAQs
What is the best time of day for wildlife photography?
The best time is during the "golden hours"—early morning and late afternoon—when the light is soft and wildlife is more active.
What equipment do I need for wildlife photography?
You need a DSLR or mirrorless camera with a fast shutter speed, a telephoto lens (at least 300mm), a sturdy tripod, and binoculars for spotting the animals without disturbing them.
How can I ensure my safety while photographing wildlife?
Always keep a safe distance from animals, avoid sudden movements, stay aware of your surroundings, and never attempt to feed or approach wildlife.
What camera settings should I use for wildlife photography?
Use a fast shutter speed (1/1000s or faster) to capture movement, a wide aperture (f4 or lower) for better light and background blur, and a high ISO setting if necessary to maintain exposure.
How can I get close to wildlife without disturbing them?
Use camouflage clothing, move slowly and quietly, utilise natural cover, and be patient. Observing from a distance with a telephoto lens helps minimise disturbance.
How do we decide?
Our in-house photography specialists, store staff, and industry partners work together to review our buying guides and advice articles. We also monitor emerging trends and listen closely to customer feedback, ensuring our recommendations stay current and relevant to what photographers and filmmakers are actually looking for.
By carefully curating the products we recommend, our guides are designed to offer clear, trustworthy advice that helps customers choose the right kit with confidence.
If you would like further advice, our contact centre team are here to help. You can also reach us via email or social media. And remember, if you purchase based on our recommendations, your order is covered by our full returns policy.
Sign up for our newsletter today!
- Subscribe for exclusive discounts and special offers
- Receive our monthly content roundups
- Get the latest news and know-how from our experts


