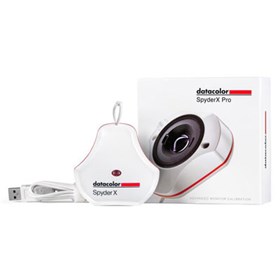
If you regularly print or share your images online, you might consider calibrating your monitor with a specialist device like Datacolor’s new SpyderX Pro

Datacolor’s new SpyderX Pro (pictured) and Elite allow you to calibrate your monitor in minutes.
Photo by Mike Harris.
Being told to calibrate your monitor is a little like being told to floss your teeth every day. You’re aware of the benefits, but that doesn’t mean you’re actually going to do it. In fact, I’m willing to bet that quite a few photographers (and filmmakers) have never properly calibrated a monitor.
Amateur photographers might consider colour-calibration hardware (like Datacolor’s new SpyderX Pro and SpyderX Elite) the preserve of professionals alone. But I reckon anyone who takes photography remotely seriously should at least consider the benefits of a properly calibrated display and here’s why…
TL;DR: Too busy to read through Mike’s ramblings right now? Scroll to the bottom of this article and check out his key points…
Monitor calibration matters
We’re happy to spend thousands on the latest photographic equipment and editing software, but what’s the point of investing in the finest gear or subtly colour grading a capture if your monitor isn’t calibrated properly? If you edit images on more than one monitor (and there’s a good chance you do), calibrating each display can help to ensure colour consistency across each workstation.
Still not sold? Consider your devoted Instagram, Flicker or 500px following. Sure, the majority of users will not be viewing your work via properly calibrated monitors, but that’s still no excuse. Optimise your display and your images are more likely to appear as you intended – work from a poorly calibrated display and there’s no telling how other users will see your work.
If you regularly print your work, you’re probably familiar with soft proofing. Soft proofing allows you to preview on screen what your image will look like when it’s printed. Yes, there’s more to soft proofing than a calibrated screen, but it’s an essential step nonetheless.
How do I calibrate my monitor?
The easiest and most accurate way of calibrating a monitor is to use specialist hardware. Datacolor is claiming that its new SpyderX series is faster, more accurate and easier to use than any of its devices to date, so I thought I’d take a look while calibrating the IPS monitor I use at home.
The SpyderX range boasts the Spyder series’ first lens-based colour engine, and I'm told this results in better colour accuracy across multiple monitors. The increased speed in which a SpyderX device calibrates is also a huge boon. It’s actually recommended that you calibrate your monitor on a monthly basis. This is because displays degrade over time, and recalibrating regularly adjusts your screen to combat these changes. A speedier calibration process means you’re more likely to actually do this.
The SpyderX Pro allows you to select from three calibration options: ReCAL, CheckCAL and FullCAL. ReCAL is a speedier calibration for monitors that have been recently calibrated, CheckCAL tells you whether your monitor needs recalibrating and FullCAL is the full calibration with all the bells and whistles. Datacolor recommends using FullCAL for your monthly calibration, so it’s likely you won’t use ReCAL or CheckCAL much. Still, it’s nice to have these options should you need them.
Once you’ve breezed through the installer you’ll want to resist the urge to plug your SpyderX into a USB port. Simply follow the easy-to-navigate menu system first. If you don’t understand something, you’ll find an unobtrusive and easy-to-read help box to the right of your screen.
I found the visual checklist for preparing your monitor particularly handy. You’re not forced to read through reams of boring text, and everything is displayed so clearly and concisely, it’s virtually impossible to miss a step. In fact, I found the whole process to be fairly effortless. I only lost time fiddling around with the poorly positioned buttons and awkward settings menus on my monitor.
A particularly ingenious feature is the SpyderX series’ Light Room sensor. The light surrounding your monitor affects how you visualise its display, so the device measures this light and adjusts your settings to compensate. Doing this couldn’t be easier; you simply place the device on your desk. The SpyderX will even tell you if there’s too much light in the room. I had to draw my curtains and turn off an overhead light, for example.

The lens cap acts as an adjustable counterweight, so the device sits flush against your screen.
The calibration process requires you to place the SpyderX directly onto your monitor’s screen (see above). This involves removing the lens cap and draping it over the top of the monitor, so it hangs down the back and acts as a counterweight.
The software generates a handy silhouette so you know exactly where to position the lens and the cord attached to the lens cap is adjustable – it’s imperative that the lens sits flush against your display. If you’re having trouble positioning the lens, try tilting your monitor back. My monitor doesn’t tilt much, so I ended up propping it against the wall behind my desk. Primitive, but it worked.
Because I used the Light Room feature, I needed to adjust my brightness before the calibration could begin. Thankfully, a handy meter appears on screen so you can set your brightness accordingly. While the calibration is running, your monitor will cycle through a series of bright colours, which the SpyderX measures. According to Datacolor this takes “just a minute or two”, and I’m pleased to say this is an accurate assessment.
If you’re ever curious as to how much the colour of your screen has changed, you have access to a variety of sample images, and can toggle between your new and old settings. You might be surprised at the difference.
SpyderX Pro vs Elite
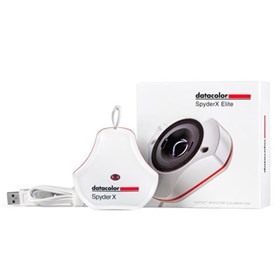
The SpyderX Elite can do everything the Pro can do and more – it’s the definitive device in the range. The Elite’s video and cinema calibration targets will appeal to filmmakers, and its soft proofing features will benefit those who regularly print their work. It’s also able to calibrate digital projectors, precisely tune side-by-side displays and features Expert Console mode, which boasts unlimited calibration options.
If that wasn’t enough, the Elite packs Datacolor’s StudioMatch technology, so you can share a calibration target with other computers or additional monitors attached to the same computer. If any of the aforementioned features are important to you, then the Elite is the way to go. For everyone else, the SpyderX Pro still features everything you need to improve the quality of your display, and hopefully, your photography.
SpyderX system requirements
- Windows 7, 8 and 10 (32 and 64-bit versions)
- macOS X 10.10, 10.11, 10.12, 10.13 and 10.14
- Monitor Resolution 1280x768px (or greater)
- 16-bit video card (24-bit recommended)
- 1GB of available RAM
Too long; didn’t read…
Who’s it for? Professional photographers and serious enthusiasts who share their work, and want to go that extra mile to ensure its quality.
What does it compare to? Datacolor’s now discontinued Spyder5 series.
Why should you care? If you invest time and money on the very best kit and the most meticulous edits, it makes sense that what you’re seeing on your monitor is an accurate representation of your images.

Datacolor SpyderX Pro

