
On commission, photographer Chris Teagles needed to create an image with a very specific, dramatic effect. He explains how he used Bowens lights to achieve it

I needed to create a high-impact image, showcasing the car and creating a lasting impression. However, the location was a drab and dull carpark with very little exciting background, and ideally the car needed to stay where it was, which was an added complication.
The solution: use a couple of Bowens lights and a little creative staging to inject the shot with some much-needed drama.
Choosing to shoot at night eliminated the background and introducing the Bowens lighting added some drama. It took a good hour to create the exposures for the final image, a process that also involved refilling buckets and re-shooting different water splashes.

A Bowens twin-head XMT500 kit
Kit list:
- Canon EOS 5D Mark III
- 24-70mm L 2.8
- Tripod
- Bowens portable lighting kit – 2 x bare bulb, plus triggers
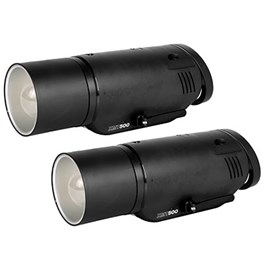
Bowens XMT500 Twin Head Kit
Engineered for speed, reliability and cutting edge aesthetics, the Bowens XMT500 Twin Head Kit boasts an enhanced specification, including TTL, high-speed sync (up to 1/8000s) flash durations as short as 1/10,309s and recycle times as rapid as 0.01s. A foldaway stand mount allows portability and easy storage, and an integrated reflector cap allows you to shoot straight out of the box.
£1,259.00 View
I shot at 24mm to get a wide and aggressive angle on the car while maximising background space for the water to fill. Having the aperture set to f/4 allowed for an image that was sharp from front to back, while also enabling the power of the flashes to impact the image. I kept the ISO to 100 and the shutter speed to 1/200sec. The Bowens flashes themselves stayed on the lowest power possible for most of the images.
Lighting setup
Two Bowens lights moved around the car for several exposures, some of them lighting the bodywork, and some lighting the water in the air. It was important to backlight lots of the shots to separate the water from the black background. I avoided light modifiers to minimise reflections on the car’s bodywork when lighting the car directly.
Using a softbox would have created a much softer light, but would also have resulted in large softbox-shaped reflections all over the cars bodywork. Placing the lights away from the car (where they wouldn’t get wet!) and shooting without a modifier created far less reflection in the car’s bodywork, thereby resulting in a much more natural, less artificial-looking image.
Technique
It would have been impossible to create the image from a single frame as the water was being thrown from buckets by my assistant, so the final images were built from layers in Photoshop.
This allowed me to pick and choose from the exposures created, using clone stamp to paint in the sections required. It’s easy to create images of still objects and light them from multiple angles using just one light by simply blending exposures in Photoshop. To fully light the car and the water I ended up blending six images total.
Results
The results were exactly what we wanted, loads of dramatic exposures with sharp, well-lit water droplets freezing the action and creating a striking final image.
Chris Teagles is a professional automotive photographer based in the UK, who has worked for a range of high-profile clients, including CAR and Pistonheads. To see more of Chris’s work, take a look at his website and follow him on Instagram.
Related articles
How to create a makeshift photography studio at home
Get the light right | An interview with fashion photographer Andy Hoang
Freezing the action | An interview with sports photographer Jesper Gronnemark
