
There’s something magical about discovering the tiny details of the natural world. From the delicate wings of a butterfly to the glistening texture of a cactus spine, macro photography gives us a new way of seeing – and celebrating – life’s smaller wonders.
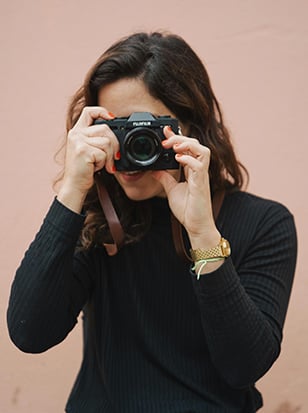
Ellie Rothnie is an internationally acclaimed wildlife photographer and Canon ambassador who provided some of her top tips and tricks for macro photography.
“Many years ago, I was a bit cautious about entering the world of macro photography. At the time, I was focusing all my attention on larger mammals and birds, and it became clear I’d need a different set of tools to start photographing the smaller things. I was hesitant to invest in a new lens, a different tripod head and all the bits of gear that come with this particular genre.
Still, I tentatively dipped a toe in – picking up a 180mm macro telephoto, a ring flash and a Kirk ball head for my Gitzo tripod. I spent hours chasing bees around the garden, before realising that flowers – and even my household cactus – were a far better (and easier) place to begin. I started seeing fascinating details that my eyes alone couldn’t pick up. And from that moment, I was hooked.”
Whether you’re just starting out or looking to refine your technique, these practical tips will help you get the most from your macro photography, with straightforward guidance and a few personal insights from years in the field.
Remember, with a bit of patience and the right approach, you’ll find beauty in the smallest of places.

European tree frog (Hyla arborea): Canon EOS-1D X and Canon EF 180mm f/3.5L Macro USM lens. Settings: f/5, ISO 800, 1/200sec. Kit: reflector, shutter release cable, Gitzo tripod and Kirk ball head.
Choosing the right lens
Macro lenses tend to be more of a specialist piece of kit and, as such, tend to come with a higher price tag. A true macro lens allows you to focus much closer than a standard lens, typically offering a 1:1 reproduction ratio – meaning the subject is life-size on your camera sensor. This makes a world of difference when you’re photographing small insects, flowers or textures.
Popular macro lenses fall in the 100mm to 180mm range. A longer focal length like 180mm allows for more working distance, which is useful if you're shooting skittish subjects like butterflies or frogs – and delivers beautiful background blur (bokeh). If you’re unsure, we have a handy guide to the best macro lenses here.
That said, you don't need a dedicated macro lens to get started. Telephoto lenses with short minimum focusing distances (like Canon’s 100–400mm) or even wide-angle lenses can give great results and variety in your images, especially when photographing a subject in its environment. Extension tubes are another good option; these fit between your camera and lens to let you focus closer without degrading image quality.
Using different lenses for your macro work can help you build a more varied portfolio – from tight close-ups to wider habitat shots. It broadens the traditional definition of macro photography, encouraging creative ways to capture the smaller details of the natural world.
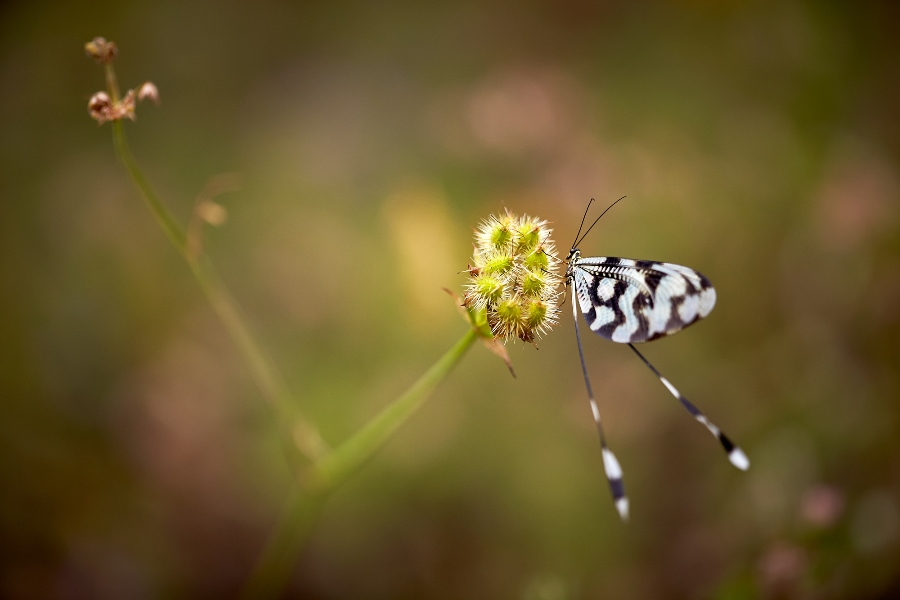
Taken with a Canon EOS-1D X and Canon EF 180mm f3.5L Macro USM lens. Settings: f3.5, ISO 400, 1/800sec. Kit: shutter release cable, Gitzo tripod and Kirk ball head.
Manual focus gives you more control
Macro work often involves razor-thin depth of field – tiny shifts can significantly change the point of focus and potentially ruin your shot. That’s why many macro photographers prefer manual focus.
Using your rear LCD and magnifying the image preview helps you focus with precision. Small movements in the focus ring can make a big difference, so take your time to get it just right.
Stability is key
A sturdy tripod is essential for most macro photography. With such fine focus and small apertures often in play, camera shake can be a major issue.
Look for a tripod that can get low to the ground (many subjects live there), and use a reliable head for fine positioning, such as a 3-Way or Pan-Tilt Head.
You’ll also want to use a cable release or remote shutter. This will make everything easier and prevent any potential camera shake when taking the shot.

Apollo butterfly (Parnassius apollo): Canon EOS-1D X, Canon EF 300mm f/2.8L IS II USM lens. Settings: f/3.5, ISO 320, 1/1000sec. Kit: shutter release cable, Gitzo tripod and Kirk ball head.
Work with the light you have
A lot of my macro photography takes place out in the field, so you’re best make use of natural light. Plus, natural light is often best for macro photography. Overcast skies work in your favour, acting like a giant softbox to diffuse light and reduce harsh shadows. Early morning and late afternoon are also great times to shoot, especially if you’re after dramatic backlighting or silhouettes.
If the light’s too flat or shadowy, a small reflector can make a big difference. A fold-out silver or white reflector will bounce light gently onto your subject. DIY versions work just as well – a piece of card and some foil can be surprisingly effective!
Artificial lighting has its place too. LED panels with diffusers provide soft, continuous light and are less intense for small subjects than standard flashguns. Ring flashes can offer even illumination, though they can feel a little flat for more creative images. Check out our guide on blending ambient and artificial light for photography here.

Conehead mantis (Empusa pennata): Canon EOS-1D X, Canon EF 100-400mm f4.5-5.6L IS II USM lens. Settings: f5.6, ISO 320, 1/640sec. Kit: Gitzo tripod and Kirk ball head.
Experiment with depth of field
We’re often told to use small apertures (like f11–f16) in macro photography to ensure more of the subject is in focus. While this is great for clarity, don’t be afraid to go the other way.
Wide apertures like f2.8 or f4 can create beautiful, shallow-focus images with dreamy backgrounds and soft foreground blur. Just be sure to place your point of focus carefully – a sharp eye or antenna can make the shot.

Aesculapian snake (Zamenis longissimus): Canon EOS-1D X and Canon EF 180mm f/3.5L Macro USM lens. Settings: f/5.5, ISO 500, 1/400sec. Kit: shutter release cable, Gitzo tripod and Kirk ball head.
Build a simple macro studio at home
You don’t need a fancy setup to shoot macro indoors. A table near a window, a curved sheet of card for a backdrop, and a few LED lights or lamps can be more than enough.
You can also use glass or acrylic to add reflections; just make sure to clean it thoroughly with an anti-static cloth before shooting. If not, your beautiful macro pictures will require a lot of dust spot removal in post-processing!
For lighting, try placing lights at different angles or use diffusers to soften the shadows. Background materials like card, foil, or even cellophane can add colour and interest.
Working indoors gives you full control over your scene – no wind, shifting light or moving subjects – making it great for practising technique or photographing inanimate objects.
Respect your subjects
Macro subjects are often delicate creatures, and their welfare should always come first. Never harm or disturb wildlife to get a photo.
Some photographers chill insects to make them less active – this is not a practice we support. It’s far better to shoot early in the day when temperatures are naturally lower and animals are still at rest.
If you're photographing reptiles or amphibians, work only with licensed specialists to ensure the subjects' welfare. Ethical photography is not only the right thing to do – it also results in more rewarding and authentic images.

European green toad (Bufo viridis): Canon EOS-1D X and Canon EF 180mm f3.5L Macro USM lens. Settings: f4.5, ISO 1000, 1/400sec. Kit: shutter release cable, Gitzo tripod and Kirk ball head.
Bonus Tip: Don’t overlook the gear you already have
Not everyone can invest in a full macro kit right away, and that’s perfectly fine. Many lenses have impressive close-up capabilities, and creative composition goes a long way.
You can combine wider shots showing the subject in its environment with tighter detail images for variety. And don’t forget that a simple extension tube can transform your existing lens into a close-up tool.
And if you don’t have any kit yet, there’s always Used kit you can look at. We have tons of fantastic equipment that will help you capture amazing macro images. Take a look here.
Kit Essentials for Macro Photography
- Macro lens (100mm–180mm recommended)
- Tripod with a low centre column
- Cable release or remote shutter
- Reflectors or diffusers
- LED lights or flash (with diffuser)
- Cleaning cloths (especially for reflective surfaces)
- Extension tubes (optional)
Ready to give macro photography a try? Pick a subject close to home – a flower, a leaf, or even a household object – and start experimenting. The more you shoot, the more you’ll discover!
About the Author
Ellie Rothnie is an internationally acclaimed wildlife photographer and Canon ambassador, tour leader and photographic guide based in the UK. Visit her Instagram, Twitter and website to see more of Ellie’s work.

The Wex Blog

Sign up for our newsletter today!
- Subscribe for exclusive discounts and special offers
- Receive our monthly content roundups
- Get the latest news and know-how from our experts


