Like the look of Clarendon on your Instagrams? Here’s a quick, easy way to replicate the filter effect in Photoshop
If you’re after an Instagram filter that will give your shots an instant wow-factor, then look no further than Clarendon. However, you may feel that crudely processing your images within the Instagram app itself is a little limiting, so we’re going to show you how to apply the effect manually in Photoshop for the ultimate level of control and convenience.
The key characteristics of the Clarendon filter include: an increase in saturation and contrast, a cyan tint in pure highlight areas and cooled down shadows and highlights. This final characteristic is particularly tricky because mid-tones need to be kept relatively warm to allow skin tones to retain a high degree of their natural colour, despite being cooled down slightly.
Emulating Instagram filters can take time because you have to identify the main characteristics, and then work out how to apply these in Photoshop. Some are easier than others, but it could take anywhere between a few minutes and a couple of hours to get everything looking just right. And even if you don’t achieve 100% emulation, 85% of the way there or more will still look fantastic.
To look at the characteristics of an Instagram filter without uploading an image to Instagram, send an image to your phone or smart device and then switch it to Airplane Mode so it’s not connected to the Internet. Then load the image into Instagram and select the desired filter before clicking on Share. You’ll then see a message that the image wasn’t posted, so click on the row of three horizontal dots and select Discard post. You can now switch Airplane Mode off and after navigating to the Instagram image folder on your phone, email the processed image to yourself so you can open it up in Photoshop on your computer to identify the characteristics of the filter. It can sometimes help to do this with a couple of different images to see how the filters affect them.
Now, here are the steps for recreating the Clarendon filter in Photoshop...
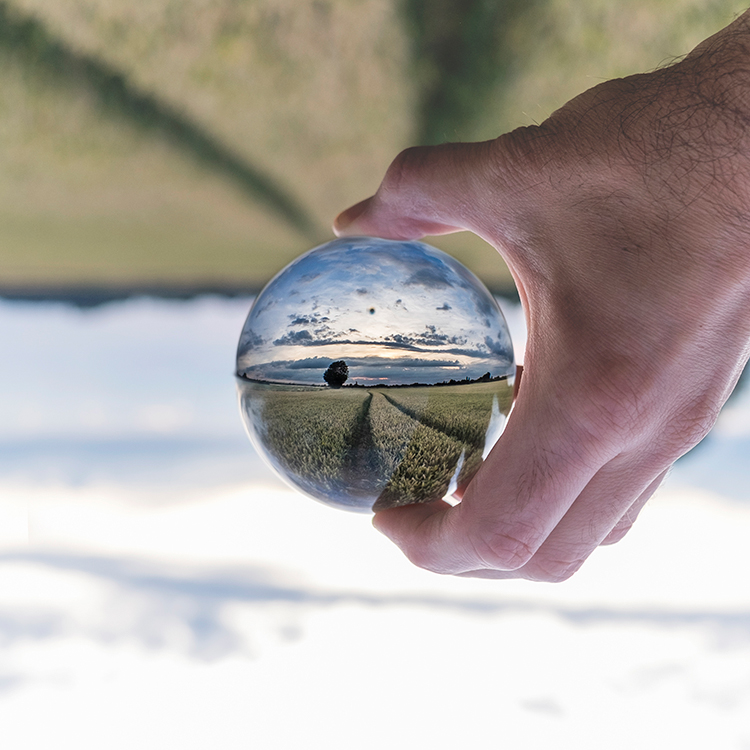
Our starting image
1. Crop your image
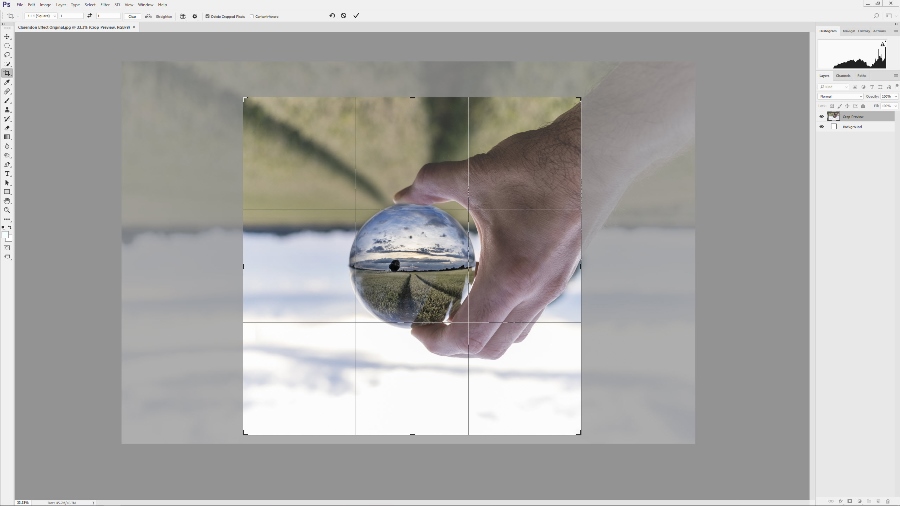
Open your image in Photoshop and press C on the keyboard to activate the Crop Tool. Now go to the dropdown menu in the top left area of the Photoshop window and select 1:1 (Square) from the list of options.
To move the crop guide, click within the guide and drag into position. To resize the crop guide, drag the corner points in or out. Hit Enter on the keyboard or click on the tick at the top of the Photoshop interface to commit to the crop.
2. Increase saturation
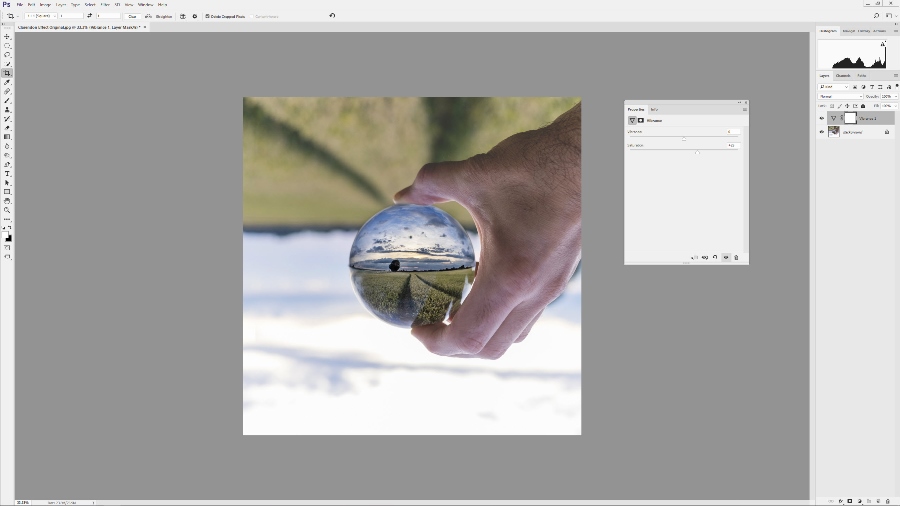
Click on the Create New Fill or Adjustment Layer icon – it’s the half-white half-black circle at the bottom of the Layers panel, and select Vibrance from the list of options.
When the dialogue box opens, drag the Saturation slider to +25 to boost all colours in the image.
The reason for applying this adjustment first is that we only want the saturation increase to only apply to the Background Layer. If it was above any colour effects it would affect these too.
3. Apply the colour effect
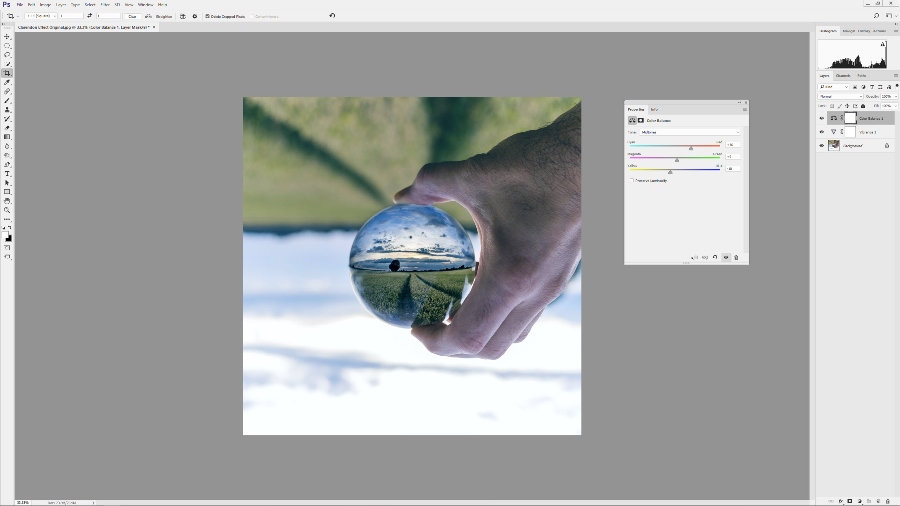
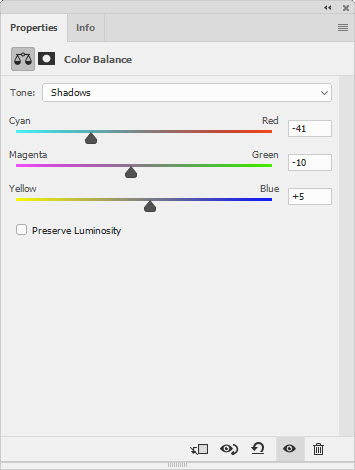
Go to the Create New Fill or Adjustment Layer icon, select Color Balance from the list of options, and set Tones to Shadows. Now set Cyan to -41, Magenta to -10 and Yellow to +5.
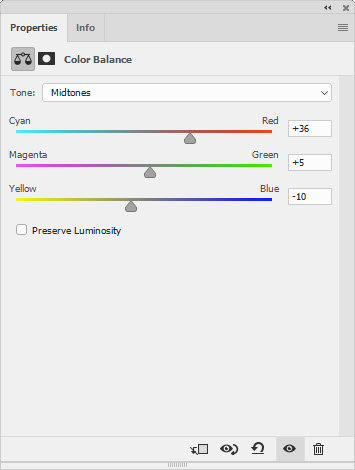
Next, select Midtones, and set Cyan to +36, Magenta to +5 and Yellow to -10.
Finally head over to Highlights and set Cyan to -30, Magenta to +4 and Yellow to +10.
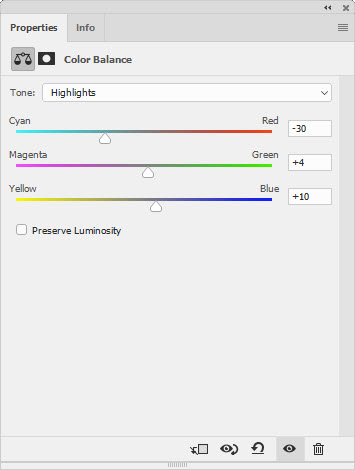
This will cool down the image dramatically while maintaining some warmth in the mid-tones/skin tones.
4. Make highlights cyan
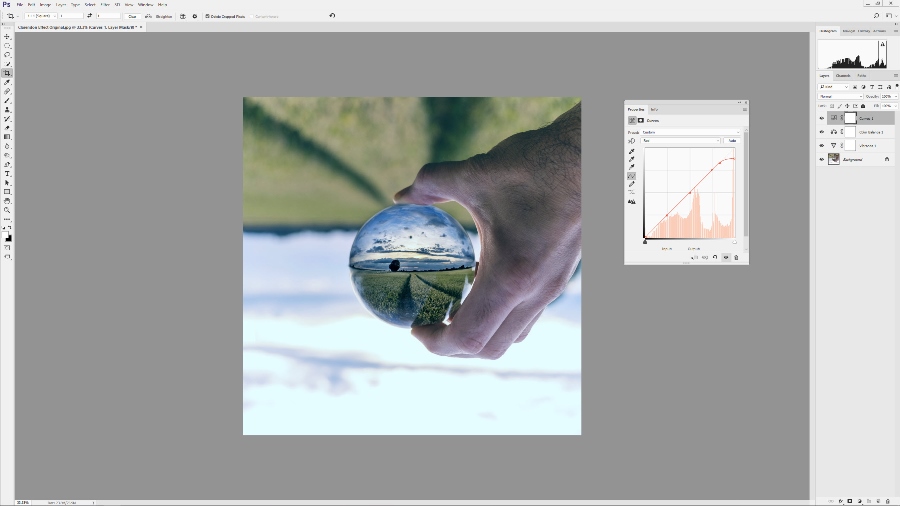
Create a Curves Adjustment Layer, and when the dialogue box opens click on the dropdown menu set to RGB to select Red. Click on the curve once at each point of the square grid, and then add a fourth point just under halfway between the previously placed point and the one in the top right corner.
Finally, click on the point in the top right corner and drag it down until Output is set at 226 before closing the Curves dialogue box.
5. Boost contrast
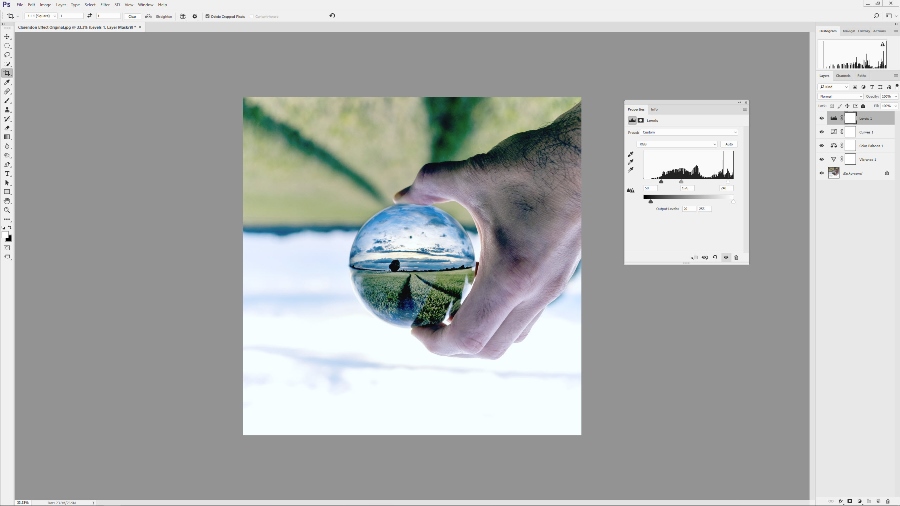
Click on the Create New Fill or Adjustment Layer icon and select Levels from the list of options.
At this stage we’re going to add strong contrast with an emphasis on blacks. Drag the black slider below the histogram to 50, the white slider to 240 and then the mid-tones slider left to 1.76 to lighten the darkened image.
At this point you can save the image as a TIFF to maintain all of the Layers, or as a JPEG to flatten it down.

The final result
About the Author
James Abbott is a Cambridge-based landscape and portrait photographer. He’s also a Photoshop expert with years of experience teaching Photoshop. Check out his work at www.jamesaphoto.co.uk.
Related articles
Recreate the Gingham Instagram Filter in Photoshop
Why Use Instagram?
How Instagram Helped Sean Byrne Become a Travel Pro

