Ever fancied photographing the night sky? Kirk Norbury shows you what equipment you need and how to get it right.

Image by Kirk Norbury
Photographing the night sky is a truly fascinating and amazing experience. The astro world has been the talk of the news recently with the revelation that certain gases in the atmosphere of Venus may be an indicator of microscopic life-forms existing on another planet. All in all, there's never been a better time to head out and capture some unforgettable night-time shots with your camera!
Looking up at thousands upon thousands of stars just blows my mind at how small we really are, and in this article I’m going to tell you some of my best tips that you can use to create some amazing photographs of the night sky, wherever you may live. It's easier than you may think, and with a few simple rules to remember you will soon be out in complete darkness creating wonderful images of the night sky.
Equipment
Essentially, you only need four things to capture images of the night sky:
1. DSLR
You don’t need a top-of-the-range professional DSLR to photograph the night sky, however, certain features are either necessary or highly advisable if you're shopping for a camera to capture the night sky. Key things to look out for are as follows:
- High ISO sensitivity. The more sensitive a camera's sensor is to light, the better it'll be at capturing the finer points of the night sky when light is harder to come by.
- A larger sensor (ideally full frame). Sensors that are physically larger are able to spread their pixels over a larger surface area, which means less image noise and a cleaner final shot. This means cameras with full-frame sensors tend to produce much better results in low light than those with smaller sensors.
- A rugged, weatherproof build. When shooting the night sky, you will of course be outside, and this means you're at the mercy of the elements. A camera with a solid, weatherproof build will be much more robust in these kinds of conditions, ensuring you can keep shooting for longer.
Some cameras you might want to consider include:

Nikon D780. This full-frame DSLR is one of the newest models available and comes with all the latest features, including an ISO range that's expandable to 204,800, making it a great choice for the night sky.
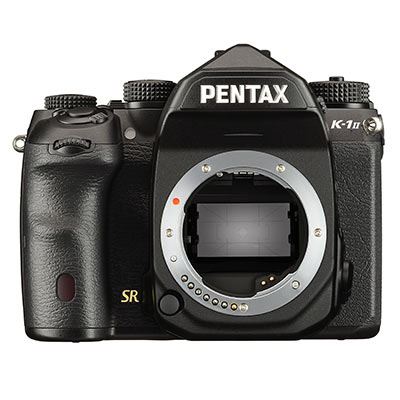
Pentax K-1 Mark II. One of the most affordable full-frame DSLRs out there, the Pentax K-1 Mark II has an impressive ISO ceiling of 819,200, so is extremely well kitted out for astrophotography. Add to this the customary Pentax-brand weather-sealing that makes its cameras so rugged, and you've got a compelling proposition that may not have the brand recognition of Canon or Nikon, but definitely has the chops to match them.
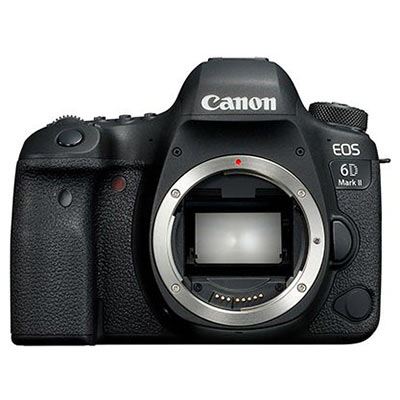
Canon EOS 6D Mark II. An older DSLR but still a great one, the Canon EOS 6D Mark II represents a compellingly affordable route into full-frame. Its large sensor produces gorgeous 26.2MP images, and with such extra features as a vari-angle touchscreen and wireless control using your smartphone, it's a great choice for any astrophotographer.
2. Wideangle lens
The night sky is huge, so you want to capture as much of it as you can. I prefer to use super wideangle lenses (usually with a focal length of 14mm or 16mm) and preferably one with a fast aperture; around f/2.8 is perfect. Which lens you choose will of course depend on your camera setup, but here are a few of our suggestions based on the cameras we've already picked out.
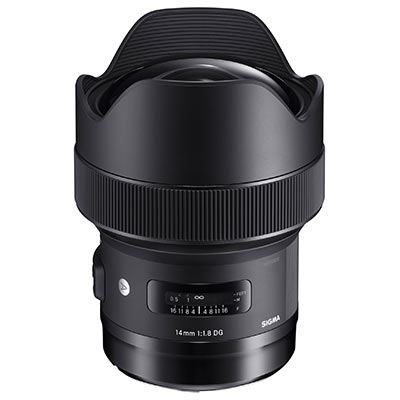
Sigma 14mm F1.8 DG HSM Art Lens. This super-wide prime for full-frame cameras is fantastically specced for the price, with a generous maximum aperture of f/1.8 just sweetening the deal as far as astrophotographers are concerned! Available for Canon EF, Nikon F, L-mount, Sony E and Sigma fits.
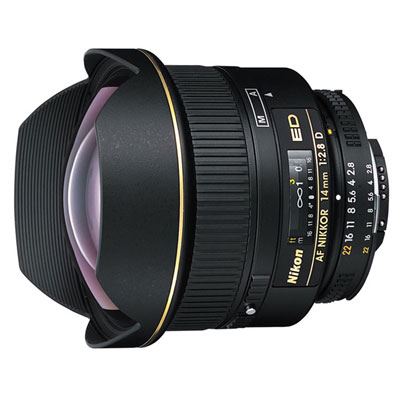
Nikon 14mm f2.8 D AF ED Lens. A high-performance ultra-wide lens, this Nikon F-mount optic features an integrated lens hood, and includes an Extra-low Dispersion glass element in its construction to reduce chromatic aberration for a clear image.
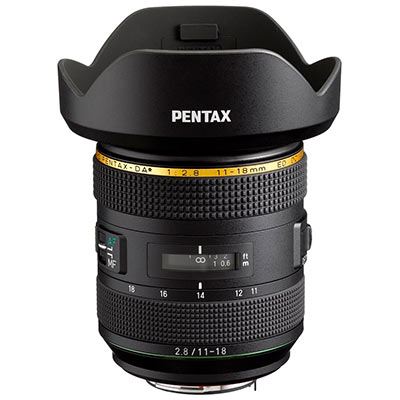
Pentax 11-18mm f2.8 HD DA* ED DC AW Lens. The perfect pair for the Pentax K-1 II, this wide-angle zoom has a constant f/2.8 maximum aperture throughout its zoom range. It's also weather-sealed, so will stand up to some punishing outdoor use.
3. A cable release or intervalometer
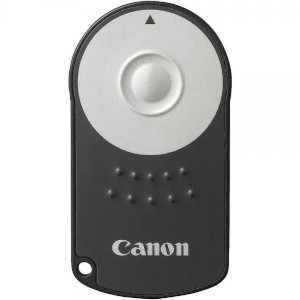
I use a cable release so I don’t need to touch the camera, which helps to avoid camera shake. I also use it for exposures that are over 30 seconds long and when I’m creating a timelapse of the night sky.
4. Tripod

A good, strong tripod is all you need with a solid head on top. Personally, I use a Gitzo carbon fibre tripod and ballhead; the Gitzo GK1545T-82TQD Series 1 Traveler Carbon eXact Tripod Kit is a good choice, giving you everything you need in a single package.
Other accessories...
While these are the four crucial bits of kit, there are plenty of other accessories that can be hugely useful for astrophotography. For more, you can check out the Wex guide to the best accessories for night-sky photography, which should give you a few ideas of the kind of thing you might find useful when out in the field.
Where and when
As you may already know, the UK can be quite bad for light pollution – but don’t let that put you off! You need to find somewhere with as little light pollution as possible; depending on where you live, this may be quite easy or extremely difficult, but it will mainly involve driving to the middle of nowhere to get the best shots. If you’re struggling to find an area I would recommend checking out the Blue Marble Navigator which shows the darkest areas around the world.

You can photograph the night sky pretty much throughout the year, but for the best results you need a good clear night with no clouds and no moon in the sky. The moon can be your worst enemy or best friend when photographing stars; during a full moon it can be too bright, which will result in you not seeing many stars in your shots. When the moon is in its first phases, however, it's light can help get a more even exposure by bringing out details in the foreground.
How to set up the shot
I recommend arriving at your location before it goes dark. This way, you'll have enough time to wander around and find an area that allows for the most pleasing composition (which you won't be able to see when it’s completely dark). Set up your tripod and force it a little into ground so it’s harder to move, before putting your camera and lens into the Manual exposure mode, usually labelled as “M”. Finally, set your lens to focus to infinity by turning the focus ring until you see the ∞ symbol.

At this point you should know the best shutter speed for your lens and camera by referring to the "500 Rule":
The 500 Rule
If you leave the shutter open too long when photographing the night sky in a single exposure, the earth's rotation will create star trails. If you'd rather capture the stars as stars (rather than trails) use this rule to calculate the most appropriate shutter speed based on the lens you're using and your camera's crop factor. Simply take the number 500 and divide it by the focal length of your lens, before multiplying it by the crop factor of your camera's sensor if it isn't full frame. Here's a table showing the longest exposures you can achieve before seeing star trails in your image:
|
Focal Length |
Full Frame (sec) |
Nikon 1.5x Crop (sec) |
Canon 1.6x Crop (sec) |
|
8mm |
63 |
42 |
39 |
|
10mm |
50 |
33 |
31 |
|
12mm |
42 |
28 |
26 |
|
14mm |
36 |
24 |
22 |
|
16mm |
31 |
21 |
20 |
|
18mm |
28 |
19 |
17 |
|
20mm |
25 |
17 |
16 |
|
22mm |
23 |
15 |
14 |
|
24mm |
21 |
14 |
13 |
Set the camera to its widest aperture (I usually set it to f/2.8) and dial in your shutter speed. Your ISO needs to be high; depending where you are in the UK your chosen ISO values will vary quite a bit, so I would recommend starting at ISO 1000. I personally use ISO 3200 for 90% of my shots but I’m shooting mainly in the Galloway Forest Park where there is very little light pollution. Now connect your cable release and fire off a test shot. Review the image and check whether you need to adjust your composition or settings to make sure your shot is sharp. You are now ready to wander around in the dark and photograph the night sky to your heart's content!
Star trails

If you want to take your night sky photography to the next level you could try creating a star trails. Throughout the night the stars will look like they’re rotating in a clockwise motion around the North Star (when really they don’t move at all, as it's the earth which rotates on its axis) and if done correctly they look amazing. For the best effect you need to point your camera at the North Star (Polaris); there are images online which show you how to find it, but if you point your camera directly north you should see it.
There are two ways you can create a star trails with your camera: one very long exposure or a stack of many shorter exposures blended into one.
A single long exposure:
If you want to take a star-trail image with one long exposure, put your camera into its “Bulb” mode and set your aperture as low as it will go – ideally f/2.8 – before setting your sensitivity to around ISO 200. Set your lens to manually focus and focus to infinity. At this point I always take a test shot for around 10 minutes to see if my exposure and composition are okay.

If everything is fine I lock the shutter and leave the camera for between one to three hours to get the best effect. Getting a perfectly exposed image can be difficult, so if this is your first time photographing the stars I would recommend the next technique.
Multiple exposures blended together:
I find this way always produces the best results. You take short exposures (following the 500 rule) and then blend them all together using either StarStax or Adobe Photoshop. There are many tutorials for this on YouTube.
Once your camera is set up and you’re happy, press the shutter release button on the remote before locking it so it keeps taking images until you want it to stop. Doing it this way means you have a greater control over exposure and, as a great bonus, you can create a timelapse video with the resulting images.
Photographing the night sky can be very easy but you will not master it overnight. It takes a lot of practise and you need to be patient as you need to remember to get a number of things right – and I should know! I’m hoping that my tips will benefit you in capturing the night sky in all its beauty.
About the Author
Kirk Norbury is a nature photographer and cinematographer based in Ayr, Scotland. You can find out about the workshops he runs and view more of his work on his website.
Related articles
iOptron SkyTracker V2 DSLR Mount Review
Shooting Shooting Stars
The Wex Guide to Astronomy: Equipment
