Looking for a non-destructive method for sharpening images? Mike Harris shows you how to do just that, with Photoshop’s High Pass filter

Photography by Mike Harris.
Sharpening can be used to reverse the effects of a camera’s low-pass filter, make details pop or simply add definition. There are plenty of ways you can sharpen an image, but Photoshop CC’s High Pass filter is favoured for being non-destructive. The filter identifies the outline/edges of an image, and when paired with a blending mode that increases contrast, will appear to sharpen it.
The beauty of this method is that you can apply the filter as a layer mask, so you’re not actually tampering with the pixels of your base layer. This also means you can paint the layer mask onto your image to pinpoint specific areas that require sharpening and avoid spots that produce moiré (an unwanted pattern that’s formed by overlapping lines). Finally, you’re able to tweak the filter’s intensity by cycling through different blend modes or lowering the mask’s opacity.
How to sharpen an image using Photoshop’s High Pass filter
1. Create a high-pass filter
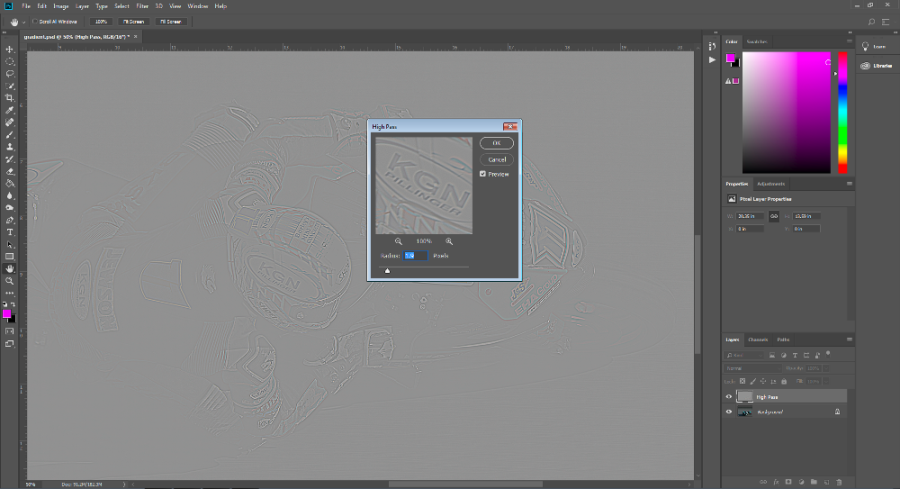
Open your image in Photoshop CC and press Ctrl+J to duplicate the Background layer – we labelled ours ‘High Pass’. Head up to the menu bar and select Filter>Other>High Pass. Your image will now be covered in a grey overlay, and the High Pass window will have appeared. Use the slider to select your radius. The higher the number of pixels, the more intense the sharpening effect will be. A useful rule of thumb is to set the radius so you can just about see the outline of your image – we rarely set it above 2.0 pixels.
2. Set the layer mode
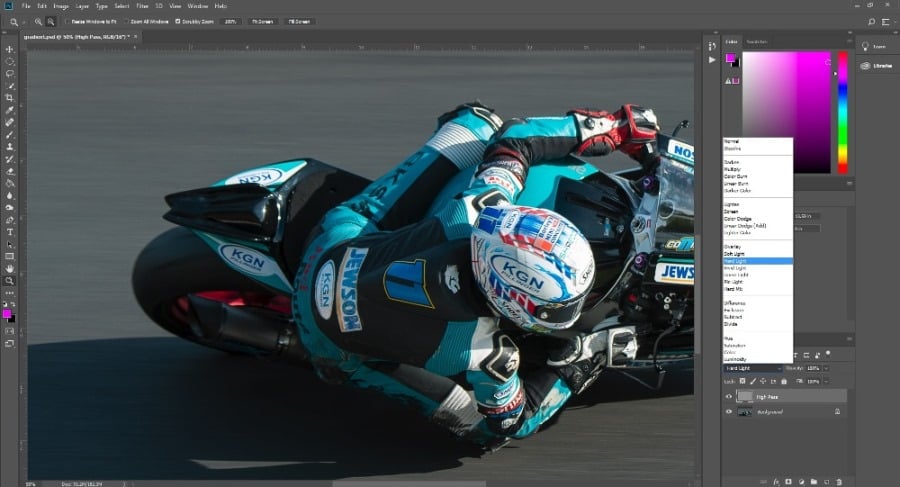
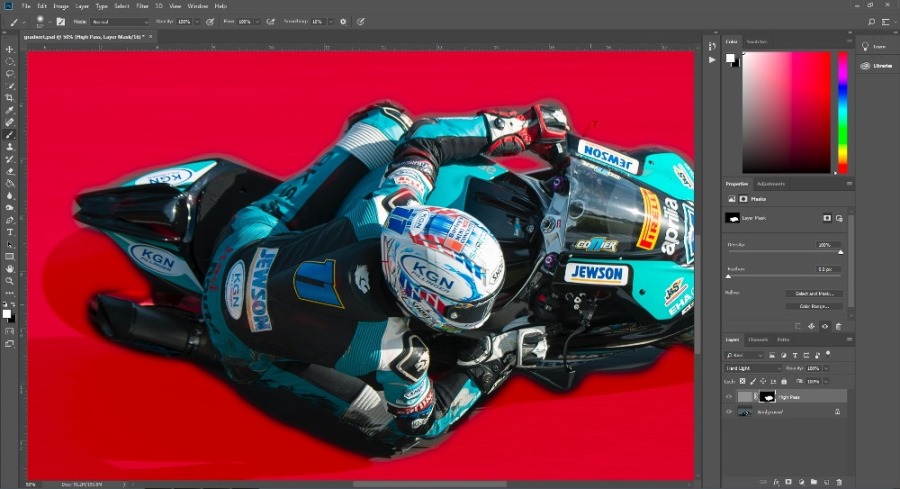
To remove the grey overlay and boost the contrast of the outline detected by the High Pass filter, you’ll need to choose from three blend modes: Soft Light, Overlay or Hard Light. Soft Light will produce the subtlest results and Hard Light will produce the most intense results. Overlay presents something of a middle ground. Once you’ve selected the desired blend mode, your entire image will appear sharper. However, to avoid any visual anomalies and to keep the image as clean as possible, you’ll only want to sharpen specific areas of the image. To do this, you’ll need to create a layer mask.
3. Create a layer mask
While on the High Pass layer, select the New Layer Mask icon (found beneath the Layers panel). Head to the menu bar and click Edit>Fill. Ensure the Fill menu is set to Contents: Black, Mode: Normal and Opacity: 100% before clicking OK. Now tap ‘\’ on your keyboard to reveal the layer mask and ensure your foreground and background colours are set to the default black and white (D). Set your foreground colour to white (X) and use a soft brush to paint over the areas you want to sharpen – you can lower the opacity of the layer mask for a more subtle effect.
About the Author
Mike Harris is Wex Photo Video’s production editor and is an experienced journalist with a passion for motorsport photography. You can view his portfolio via @MDHarrisPhoto on Instagram.
Related articles
The beginner's guide to motorsport photography
Recreate the Gingham Instagram filter in Photoshop
The latest photography and video news

