
Bowens firmware process for upgrading XMTR transmitters
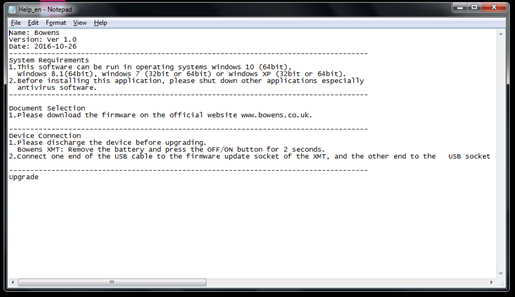
N.B. Firmware updates can only be completed on Windows computers, the firmware update application is not compatible with Mac operating systems at this time.
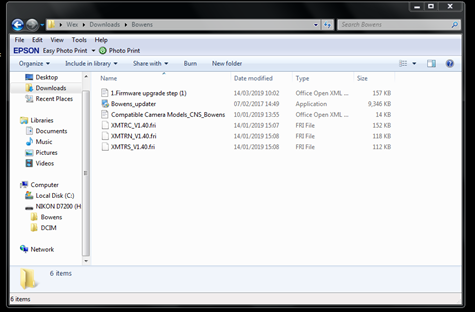
Downloads
- Version 1.40: Download the Firmware Updater (9.7MB zip)
- Latest: Download the Firmware Updater (9.9MB zip)
Includes:
Canon v1.42 adding compatibility with the EOS 1DX III, EOS R5 and EOS M6 II, 90D, 850D and 200D II
Sony v1.41 adding compatibility with the a7M
How to update your Firmware
Step 1
Download the Bowens update from the following link - and save the contents to a folder on your computer.
Step 2
Double click the Bowensupdater.exe application, and this will load the updater installation wizard.
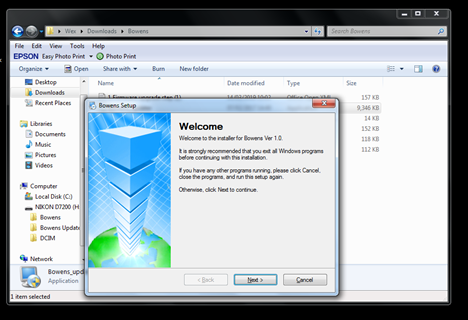
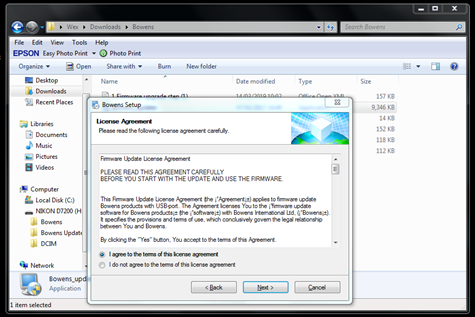
Step 3
Read the EULA, and if happy to proceed click the next button.
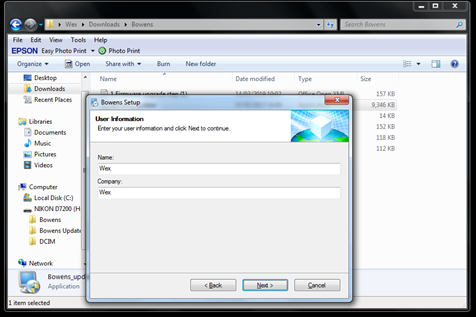
Step 4
Enter information for the user and click next.
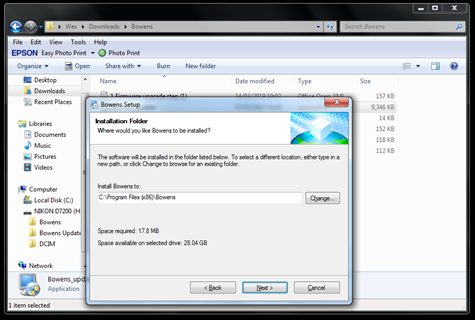
Step 5
Select an appropriate folder for the installation – by default this will install the application to C:\programfiles (x86)\Bowens
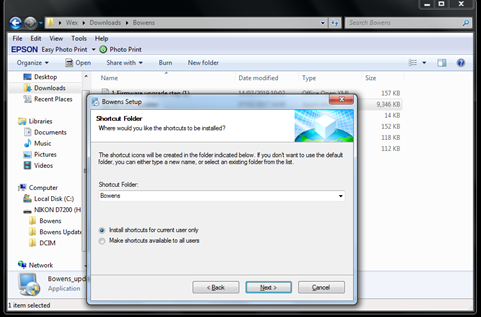
Step 6
Confirm where you wish to install a desktop shortcut and other shortcut settings
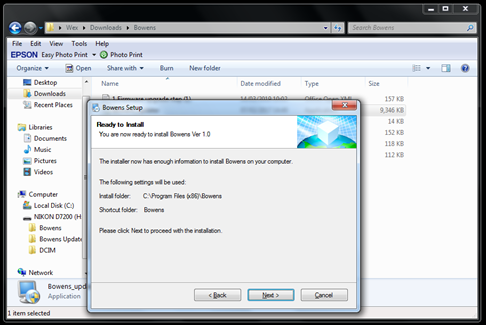
Step 7
Please check all installations settings on the next page and click Next to proceed with the installation
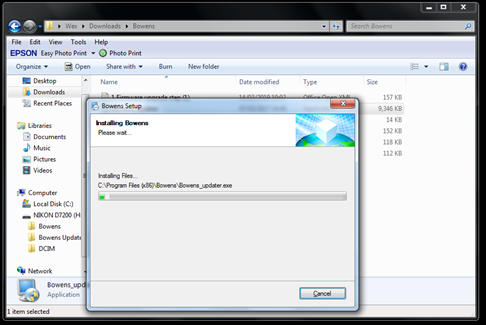
Step 8
Installation progess…. …. …. ….🙂
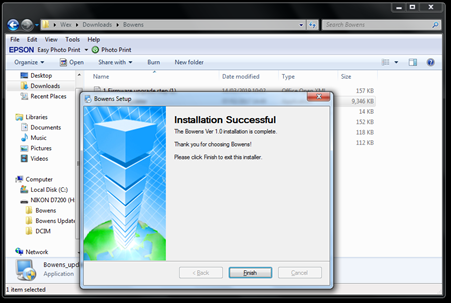
Step 9
Once installation is complete you will get a confirmation window. (screenshot 9) Please click Finish to close this window.
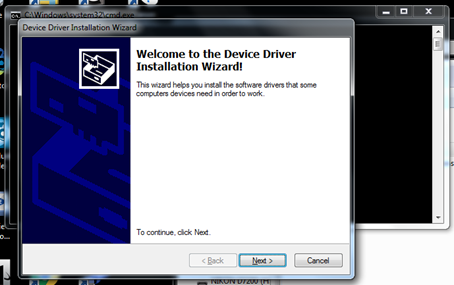
Step 10
When closing the application, a second window will open to install the device drivers for the Bowens equipment.
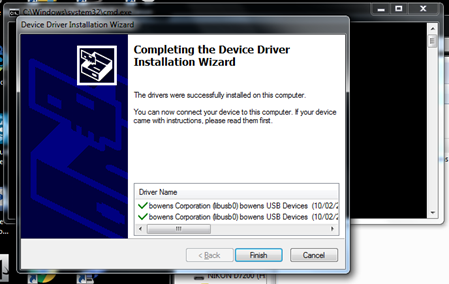
Step 11
Upon completion you should see the following screen confirming the Bowens drivers installed.
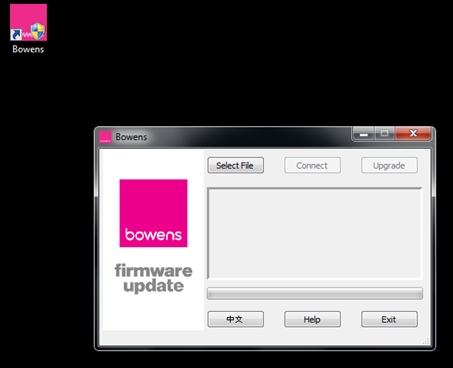
Step 12
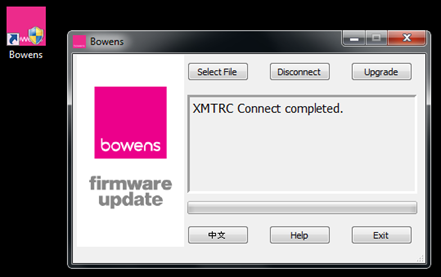
To begin firmware updating, please double-click the Newly created Bowens shortcut on the desktop. The application has 6 buttons, the bottom row are for selecting the language of the application, a help function and an Exit button to close the application.
Step 13
Click the Select File button and choose the appropriate firmware option for the version of the XMT you are updating (XMTRC_V1.40.fri for Canon, XMTRN_V1.40.fri for Nikon or XMTRS_V1.40.fri for Sony models.) and click open
Step 14
With the correct file selected, the updater will confirm the appropriate model for the file. Please note, to complete this firmware update, you need batteries in the device but the transmitter should not be turned on throughout the process.
With the XMTR radio transmitter turned off, connect it to your computer using a micro USB cable (the socket for this is located on the right hand shoulder of the transmitter, under a flap along with the PC sync socket.) Windows will automatically install device drivers for the transmitter, please wait for this to complete. With the transmitter still turned off, once the drivers are installed click the ‘Connect’ button on the application to establish a connection. You should see the following screen

Step 15
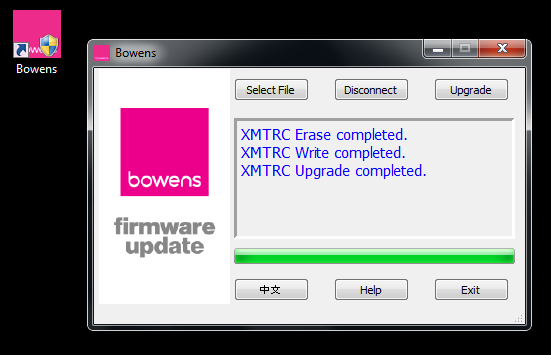
Click the ‘Upgrade’ button and the application will upgrade the firmware of the XMTR, in a 3 stage process erasing the original firmware, writing the new firmware and completing the install.
Do not disconnect the XMTR or change any settings on the device whilst firmware is being updated.
Step 16
Once this process is complete and you have seen the phrase "XMTRx Upgrade Completed" the 'Connect' button changes to 'Disconnect'. Please click this button to safely disconnect the transmitter, and the application can then be closed by clicking 'Exit'.
Over 90 years of lighting history
Dependable Lighting: All Bowens products come with a full two-year, Fixation-approved warranty. Fixation is the dedicated repair, rental and service wing of our group.
Ultimate Flexibility: The Bowens XMS and XMT heads fit all existing S-type light modifiers, from the super soft to the snoot, Lumiair or any S-type softbox.