
Having the right astronomy equipment is key to successful stargazing. Astronomy can be taken up by practically anyone with very little knowledge or equipment from the outset — you don’t need to spend loads of money on hugely expensive equipment. Everybody starts somewhere after all, and if you’re a little confused and intimidated by the huge range of telescopes and other astronomy paraphernalia on offer, this guide is for you.
Lots of members of the team at Wex are huge astrophotography enthusiasts, and multiple experts have chipped in to this guide. We’re focusing on covering the basics for newbies here — this guide is intended for those who don’t have their own telescope yet.
Once you’ve got your telescope set up and running, a good first exercise can be identifying the other planets in the solar system — see our guide to how to identify planets for more on how to do it. And if you fancy capturing the sights you see, we also have a guide to how to photograph the night sky.
How do telescopes work?
The “business end” of the telescope is the optical tube assembly. All optical telescopes operate on the principle of gathering as much light as possible, and in bringing the light into a common focus point, whereby it can then be magnified by an eyepiece. This can be done in one of several ways, depending on the tube’s optical design.
There are several types, but there are three telescope designs that are most used nowadays. These are:
- Refractors, which use a lens to bring the light into common focus
- Reflectors, which use mirrors
- Catadioptrics, which use a combination of a lens and mirrors.
All three designs use what’s called a primary lens or mirror of a set diameter, which brings the light into the all-important “common focus point”. This diameter becomes what is known as the telescope’s aperture.
The first rule of thumb in buying a telescope is: the larger the aperture, the more light the telescope will gather, and therefore the better the resolution and contrast of the resulting image will be. Also, be aware that a telescope’s aperture is expressed in millimetres (mm).
Types of telescope
Let’s have a closer look at each of the optical designs of telescope.
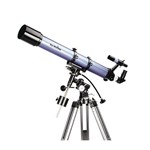
Refractors
A refractor incorporates the simplest method to gather light. It has a lens at the front of its optical tube where the light is refracted to a focus point at the rear, where it can then be magnified.
Refractors can have one or several individual glass elements to make up its main primary lens, with benefits increasing as the more elements are used. By using more than one element, the lens can more accurately bring different wavelengths of light into focus, thereby reducing colour (chromatic) aberration.
Because refractors can use several glass elements, each of which have to be precisely ground and polished, they can be expensive compared to reflectors (more on which below). Refractors, though, are considered the best telescopes at resolving the moon and planets, due to the fact they have no central obstruction. Also, as they use a fixed lens, there’s no danger of dust issue within the assembly, and they don’t have to be collimated (the process of aligning a reflector telescope).
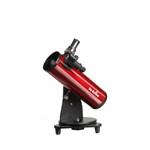
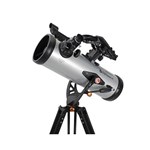
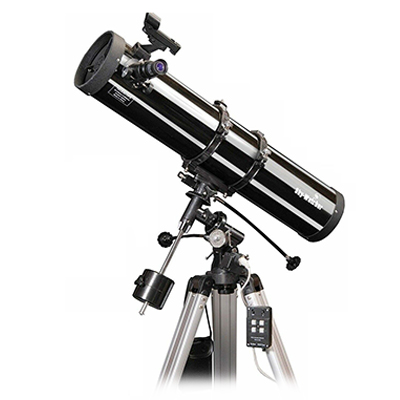
Reflectors
Reflectors use a concave mirror. A reflector telescope’s aperture value refers to the diameter of its mirror.
The mirror is located at the back of the tube assembly, with the light entering from an open front end. The light is then reflected from the mirror back up the tube to another “secondary” mirror, set at a 90-degree angle. This then reflects the light out through an opening and to the eyepiece.
The key advantage of reflectors is their affordability. Large mirrors are less expensive to manufacture than complex lenses, so reflectors are far cheaper than refractors or catadioptrics (see below), size for size. Also, reflectors lose no light during the “gathering” process, as opposed to refractors, in which unless a very expensive lens design is used, some light will be scattered, and to a degree lost.
The disadvantages of reflectors are that since they are an open tube system, dust on the primary mirror can become an issue, although to be fair, a layer of dust will only stop a minuscule fraction of a degree of light. Unless the dust has built up to an extreme degree, you’re best off leaving it, as dusting with the incorrect type of cloth can do more damage than the dust itself.
Also due to reflectors’ open tube assembly, differences in the air temperatures within the tube and the air outside can cause convection currents, reducing the telescope’s ability to sharply focus. For this reason, it’s best to try and keep your telescope at a consistent temperature. Taking it straight from a warm room to a cold outdoors can cause problems.
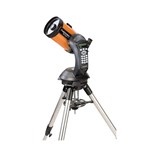
Catadioptrics
These telescopes use a combination of a lens and mirrors, with the mirror being the primary. Light enters through a lens called a correcting plate at the front of the telescope, reflects off the mirror at the back, and is then reflected back down the tube by a smaller mirror fixed to the middle of the corrector plate.
The benefit of catadioptrics, having folded the light twice within its tube assembly, is that they’re the most compact and portable of the three designs. They are considered a very capable all-rounder for viewing most celestial objects, and have no internal dust issues.
Their main downside is cost. They generally come out as the most expensive design, with their internal assemblies containing ground glass and mirrors.
Secondary telescope accessories
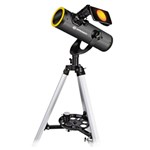
Telescopes are generally brought as a kit containing everything you need to get you going — this is how most people will buy their first telescope. A kit should consist of a tripod and mount, the optical tube assembly, and a host of other parts. Let’s have a look at these in a little more detail and familiarise ourselves with them.
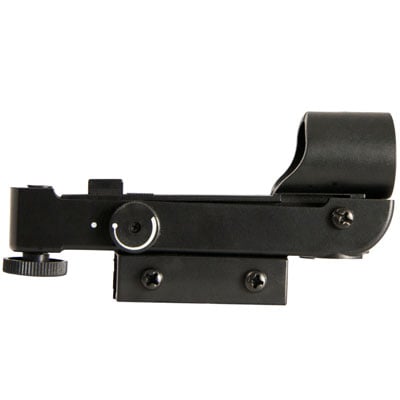
Finder-scope
This small sighting scope attaches to the tube assembly, and is used as an aid in locating celestial objects. All finder-scopes operate on the same principles, regardless of their design — which can be a straight, 90-degree, or red-dot finder.
A finder is aligned to the optical tube assembly. You then use it to “sight” the object you want to view in the finders cross-hairs. This done, you move to your eyepiece, and presto, the object in question should be in the middle of the field of view.
To align the finder to the telescope is a simple enough task and best done in daytime.
First, use a low-powered eyepiece to locate and centre an object that is at least 500 meters away. Then simply direct the finder-scope to the same object, using its cross-hairs, red dot or other sighting method.
Focuser
This isn’t an accessory as such, but a vital part of a telescope’s design. In short, for refractors and reflectors, the focuser moves the diagonal or eyepiece holder along the focal plane so focus can be achieved.
Design is usually of a rack and pinion type, although some “draw-tube” designs can still be found in older telescopes. What to look for is a smooth, slick action, and if possible a dual-speed focuser.
In catadioptrics, the design is simpler — the primary mirror is generally moved back and forth via a small knob to change the distance of the focal point along the focal plane, and hence achieve focus.
Diagonals
A diagonal (if required) is situated between the eyepiece or eyepiece holder and the focuser, and is generally only used on refractors and catadioptric telescopes. Its function is mainly to aid comfort in viewing by reflecting the light coming out from the telescope by 45 or 90 degrees, therefore allowing a more suitable position for the observer when viewing for long periods. Diagonals are also used to “erect” an otherwise inverted image, making the telescope suitable for terrestrial observations.
Eyepiece holder
Normally an integral part of a diagonal or focuser, but can sometimes be a separate accessory supplied with a kit if required. In essence, this does what it says it does: securely locates and holds the eyepiece in the required correct position, by means of two or three tightening screws around a short barrel.
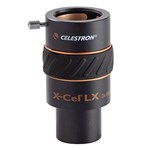
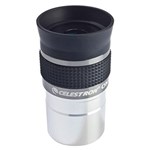
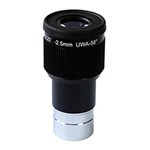
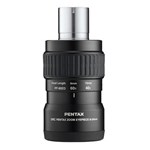
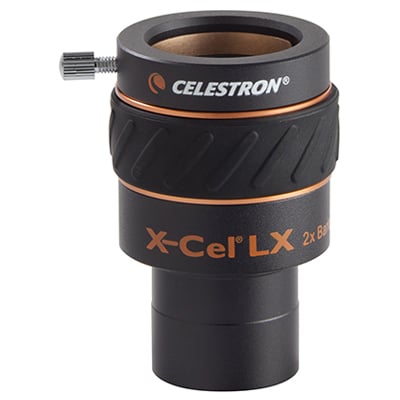
Eyepieces
A vital element of the telescope. Eyepieces provide the all-important magnification of the image at the focal point, and come in many different designs and “strengths” of magnification.
An eyepiece is generally referred to by its focal length, which when divided by the focal length of the telescope will give the figure of the resulting magnification.
For example, say 25mm eyepiece was being used on a telescope with a focal length of 1000m. To calculate the magnification, we would therefore divide 1000 by 25, giving us a 40x magnification.
The second part of an eyepiece’s name will be its optical design, which may be a Plossl, Wide-Angle or Long Eye-Relief, amongst many others. Each design has different characteristics for differing applications. In general, most kit lenses are Super Plossl, which perform very well.
Tube-rings and mounting bar
These simply allow for the attachment of the optical tube assembly to the mount. Tube rings fit around, and hold the optical tube assembly, to which the mounting bar is then bolted, which itself fits to a matching slot in the mount from where it can be fixed, much like a quick release plate on a photographic tripod. Mounting bars can also be directly fixed to the optical tube assembly on smaller, lighter tube assemblies.
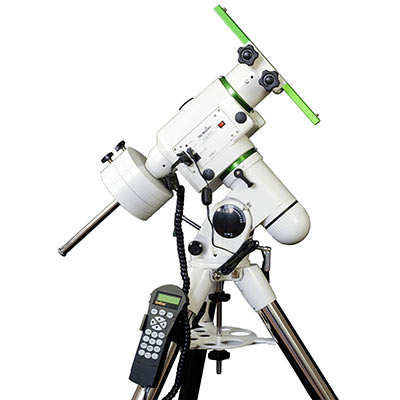
Mount and tripod
Tripods are vital in astronomy. The mount and tripod can be thought of as the firm foundations of a telescope. The tripod provides the support, height adjustment and weight-bearing, with the mount providing the ability to move and adjust the telescope’s orientation.
If you're buying a telescope as a kit, then the manufacturers will match it up with a suitable mount and tripod. However, if you’re looking to upgrade, or buy one to make up a kit, a little more consideration will be required prior to buying. Any mount and tripod combination you buy must be designed to support, at minimum, the weight of your telescope setup. Mounts and tripods are not cheap, but it’s best not to try and cut costs here, as you may find objects you’re attempting to view dancing tantalisingly out of your reach.
There are two flavours of mount used again pretty much exclusively nowadays: the AZ, or Altazimuth, and the EQ, or Equatorial. Both come rated as to their weight-supporting abilities from 1 to 6, with 1 being the smallest, least expensive and lightest load carrier, and 6 being the opposite.
The Altazimuth mount is generally used on smaller, beginner scopes, or scopes which will also be used terrestrially. It has two axes of movement, horizontal and vertical, enabling it to move in altitude and azimuth.
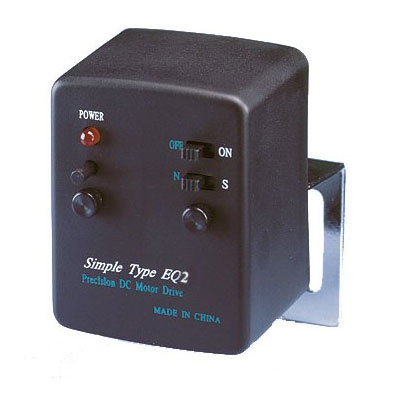
Equatorial mounts have a Right Ascension and Declination axis, and require an initial setup for each viewing, after which they can then follow an object using movement on just one axis. The main advantage of this for astrophotographers is the ability to locate celestial objects using their coordinates.
Astronomy categories
The Wex Blog


Sign up for our newsletter today!
- Subscribe for exclusive discounts and special offers
- Receive our monthly content roundups
- Get the latest news and know-how from our experts


