Unboxing a new camera is always exciting, but a little bit of setup goes a long way. Follow this straightforward guide to get your camera ready and start capturing brilliant shots straight away.
In this article, we’ll walk you through the key steps to set up your camera properly, so you can get the most out of it from day one. Some steps may seem simple, and some are easy to overlook, but whether you’re brand new to photography or just need a refresher, we’re here to help. At Wex, we believe there’s no such thing as a silly question; everyone starts somewhere, and a few minutes of setup now can make a huge difference out in the field.
1. Charge the battery
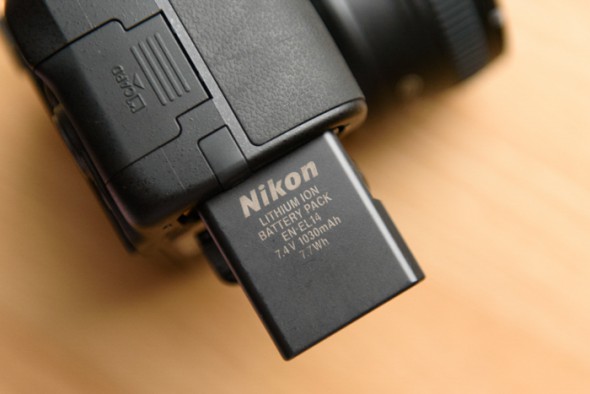
First things first - give your battery a full charge. Charging it to 100% initially can help ensure optimal performance and potentially extend its lifespan. This is an ideal time to flick through your manual and get familiar with your camera’s controls and menu layout. A fully charged battery means no surprises when you head out shooting, especially when it's your brand-new camera.
2. Insert the memory card and attach a lens
Once charged, pop in the battery and memory card. They only fit one way, so don’t force anything. They should click smoothly and satisfyingly into place.
If you’re using an interchangeable lens camera, whether it’s a DSLR or a mirrorless camera, attach any lens you have to hand for now; you can swap it later. Power up and you’re ready for the next step.
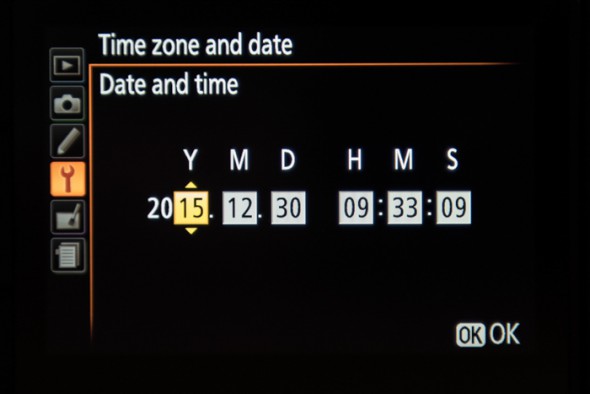
3. Set your language, time and date
Most cameras prompt you to choose a language and set the date and time when you turn them on for the first time. Take a moment to do this properly, as it will help you organise your images later - each shot stores this information in its metadata.
You’ll find these settings in the setup menu (often shown as a spanner or cog icon) if you ever need to tweak them again.
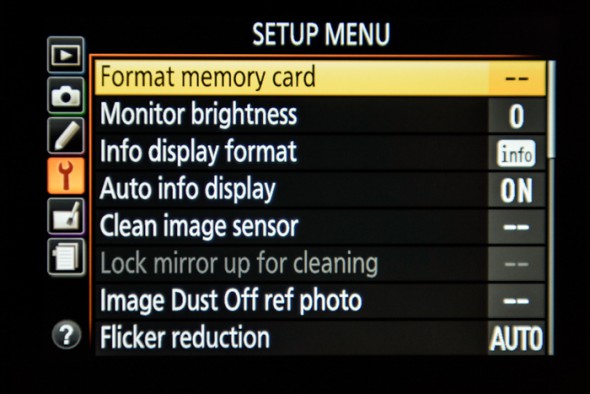
4. Format the card
Formatting your card prepares it for storing photos and helps prevent errors. The format option will be in the Tools/Maintenance menu.
Your camera most likely uses SDHC or SDXC cards. If you’re unable to format the card in-camera, switch the camera off and remove the card. Check the small tab on the left-hand side; it should be in the uppermost position. If it’s slid down, the card is write-protected, which prevents any changes or formatting. Simply slide the switch back up if needed, then reinsert the card carefully. Switch the camera back on and try formatting it again
Important: Bear in mind that formatting will erase everything on the card, so back up any files, if you have any already on your card
5. Set your image quality and size
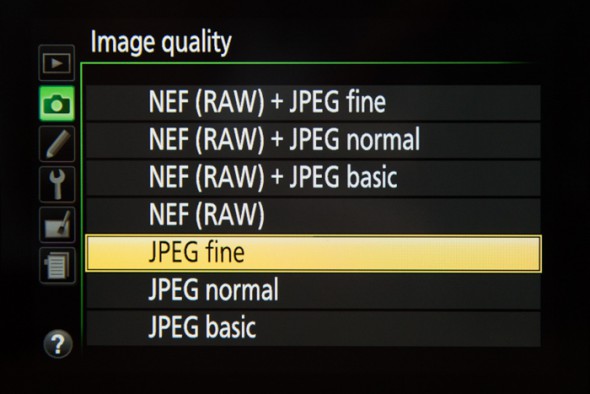
Next, you’ll want to decide how your photos will be saved:
- JPEG: These are ideal for beginners, and the images are ready to share straight from the camera.
- RAW: This type saves more data in the image, which is useful for editing later. However, this file type requires specific software to be used.
- RAW + JPEG: If you have a large enough memory card, we’d say go for both. This saves both file types, which is perfect if you plan to learn editing. This is only recommended if you have a 32GB card or larger.
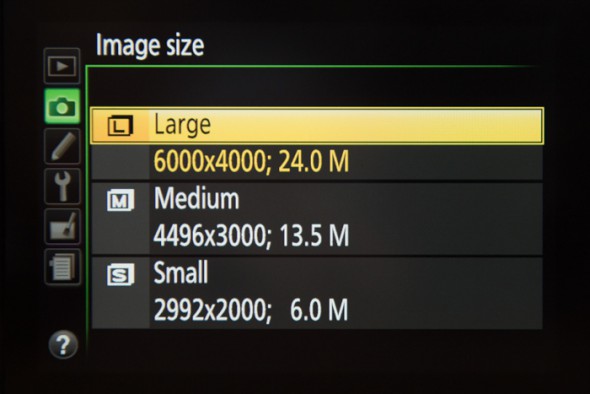
If you do go for JPEG, choose the highest-quality JPEG setting. Also, set your Image Size to ‘Large’ - this will capture the most detail and give you flexibility to crop later. And, while RAW files are best for editing, you can still edit with JPEGS - you just have less flexibility with changing colours etc.
Note: The Large Image Size option may not be available if you’ve selected RAW-only shooting, as it will default to the largest size.
But what is a RAW file?
A RAW file is much like a film negative; it holds all the basic information about an image but still needs processing to define aspects such as colour, contrast and sharpness. Some cameras allow you to process RAW files in-camera, but most people prefer to do this on a computer using software like Adobe Lightroom, DxO or similar.
This gives you greater control to produce images exactly as you want them and is ideal when you need the highest possible quality for printing or archiving. However, most cameras produce excellent JPEGs straight out of the camera, so shooting in RAW may be unnecessary for everyday photography.
6. Check your white balance
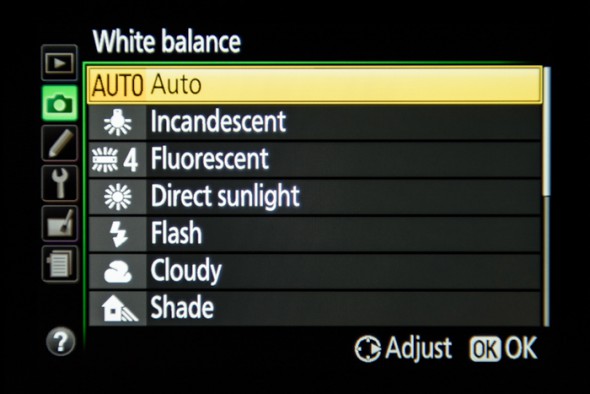
White Balance keeps your colours looking natural and true to life. The default ‘Auto’ (AWB) setting works well in most general day-to-day images. But if your photos look a bit too warm or cool under indoor lights - perhaps in tungsten or fluorescent light - your camera may struggle to render the scene accurately. In these cases, you can try the preset that matches the light source, and switch back to Auto when you’re done.
7. Choose a colour style
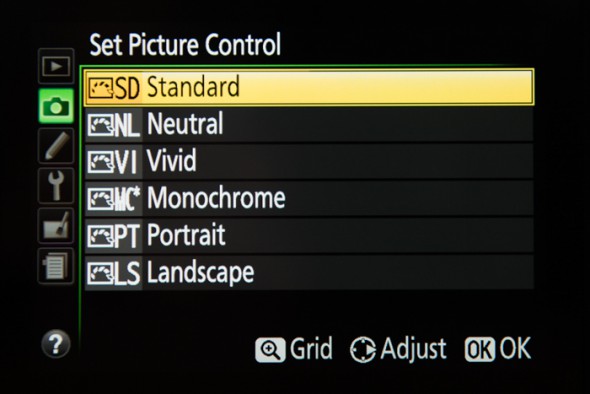
Most cameras include built-in colour styles. They'll be called different names depending on the brand e.g. Picture Control (Nikon), Creative Style (Canon) or something else, but all do the same thing, which is to determine how the colours in your images appear:
- Standard: This is good for everyday use and will capture more or less what you see in front of you.
- Vivid: This style will make colours more vibrant. There are loads of applications here. It’s great for things like landscapes.
- Portrait: This often produces softer tones, which makes for more flattering skin.
- Monochrome: Black and white. Striking. Classic. Super versatile.
If you shoot RAW, your photos will look natural, and you can change this later when editing. For JPEGs, the style is locked in, so you can’t change it once you’ve taken the photo, so make sure you choose what suits your subject.
8. ISO settings
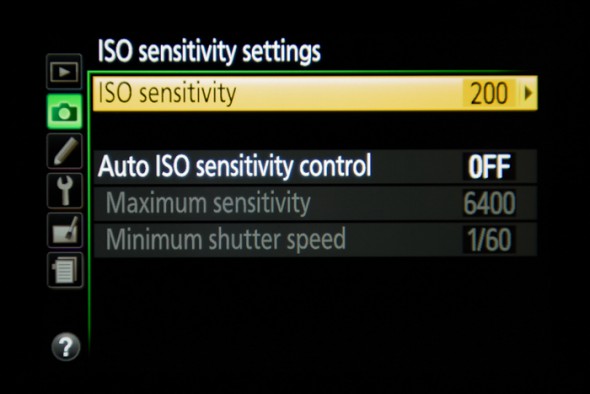
ISO controls your camera’s sensitivity to light. Lower ISOs (like 100 or 200) give the cleanest images, while higher ISOs (like 3200 or 6400) help in low light but can produce grainy with coloured speckles (known as image noise).
When starting out, set ISO to Auto. Your camera will pick the best setting for you until you’re confident adjusting it manually. In all honesty, many professional photographers will opt for Auto ISO as modern cameras are so good at choosing the best ISO. This also allows them to focus on other things, like composition.
9. Check your focus settings
Modern autofocus is excellent, and most cameras come with loads of focusing options, which can be a bit overwhelming at first. These usually fall into two main types:
- AF-S (Single): This lets you pick just one point yourself, whether that’s in the centre or off to one side. This is really handy when you want to keep focus in the same spot every time, like when your subject isn’t moving, like portraits.
- AF-C (Continuous): AF-C will track moving subjects. Many cameras will have different levels of sensitivity and different options for how the AF behaves. There are often presets, for example, some will have an option for suddenly appearing subjects or to ignore obstacles and continue to track the subject.
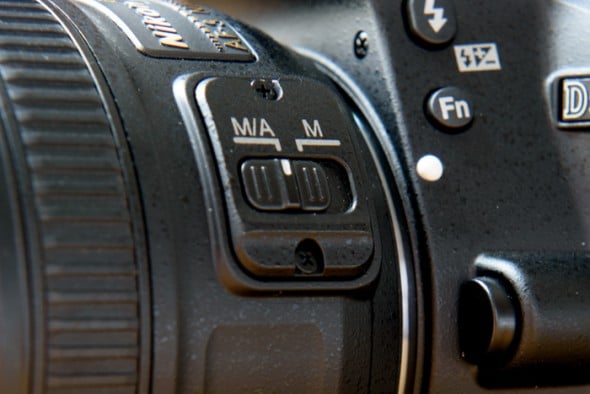
- M (Manual): You’ll also have the choice to switch off autofocus altogether and focus manually using the ring on the lens. This gives you full control and is often used when you need precise focusing of a specific part of your scene, e.g. macro photography.
For general, everyday shooting, the single-focus mode (AF-S) is absolutely fine and takes the fuss out of things.
Extra tips:
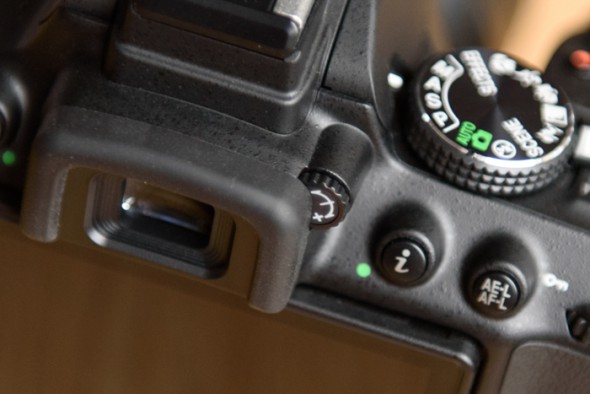
Adjust the viewfinder
If your camera has a viewfinder, use the small dioptre dial next to it to fine-tune the focus until the info display looks sharp to your eye. It only takes a second, but it makes shooting way more comfortable.
Switch on image stabilisation
If your lens or camera has image stabilisation (IS, VR, OSS), make sure it’s switched on. This helps keep your shots sharp, especially when handholding the camera in lower light.
You’re ready to go!
Take a few test shots, scroll through the menus, and get comfortable with your camera. You can’t break anything by exploring. The more you play, the quicker you’ll learn.
Sign up for our newsletter today!
- Subscribe for exclusive discounts and special offers
- Receive our monthly content roundups
- Get the latest news and know-how from our experts


